---
title: Machines API
layout: framework_docs
objective: This guide shows you how to use the Machines API to create a Fly.io machine that runs an MCP server remotely.
status: beta
order: 2
---
The [Machines API](https://fly.io/docs/machines/api/) is a low level interface that provides access to the full range of platform services.
It consists of a set of REST and a GraphQL interfaces. You can access these from any programming language
capable of producing HTTP GET and POST requests and the ability to generate and parse JSON.
An example of when you would want to use the Machines API is when you want to create a [Per-User Dev Environment](https://fly.io/docs/blueprints/per-user-dev-environments/)
This guide presumes that you are running MacOS, Linux, or WSL2, and have [curl](https://curl.se/) installed.
## Select an organization
All Fly.io users have a personal organization and may be a member of other organizations. Set an environment variable with your choice.
```sh
export ORG="personal"
```
## Organization token
To get started, you need an organization token, which you can obtain via the dashboard.
Go to https://fly.io/dashboard, change the organization if necessary, select Tokens from the list on the left hand side of the page, optionally enter a token name or an expiration period and click on Create Organization token. Once complete you should see something like the following:
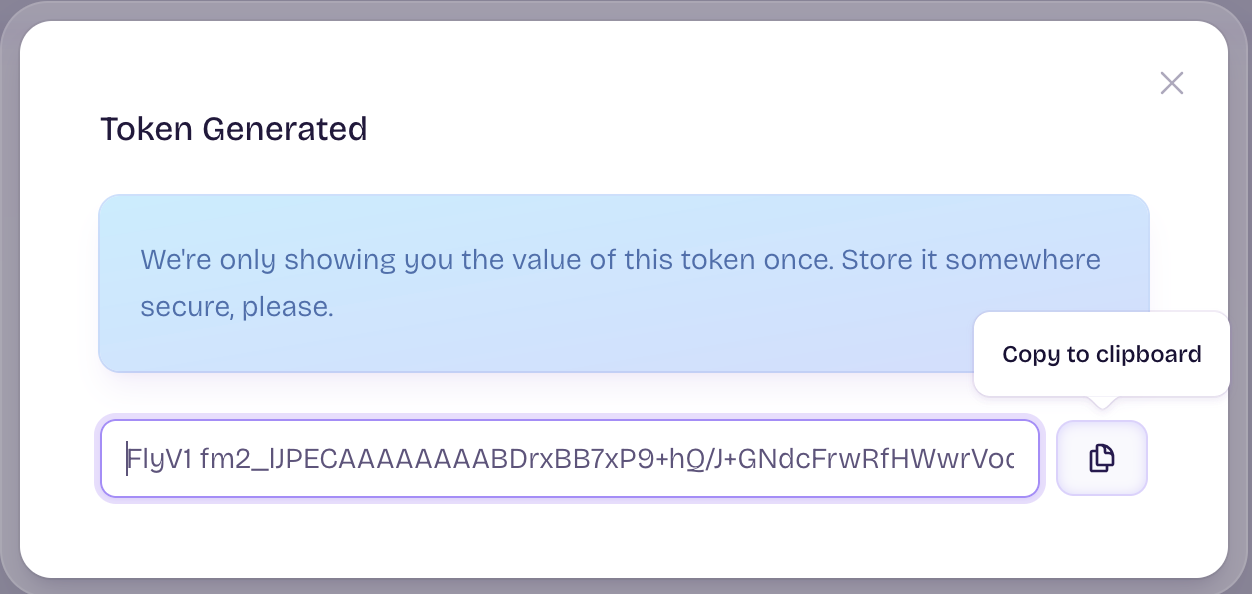
Click on Copy to clipboard, and then run the following command with your token pasted inside the quotes:
```sh
export FLY_API_TOKEN="FlyV1 fm2_IJPECAAA..."
```
## Select an API hostname
The host name you chose depends on whether your application is running [inside or outside your Fly.io private Wireguard network](https://fly.io/docs/machines/api/working-with-machines-api/#api-addresses). If you are not sure, use the public base URL:
```sh
export FLY_API_HOSTNAME=https://api.machines.dev
```
## Chose a hostname for your app
You are free to chose any available hostname for your application. The following will generate a name that is likely to be unique:
```sh
export APP_NAME=mcp-demo-$(uuidgen | cut -d '-' -f 5 | tr A-Z a-z)
```
## Create your app
Now use the [Create a Fly App](https://fly.io/docs/machines/api/apps-resource/#create-a-fly-app) API:
```json
curl -i -X POST \
  -H "Authorization: Bearer ${FLY_API_TOKEN}" \
  -H "Content-Type: application/json" \
  "${FLY_API_HOSTNAME}/v1/apps" \
  -d "{ \
      \"app_name\": \"${APP_NAME}\", \
      \"org_slug\": \"${ORG}\" \
    }"
```
Response should be a `200` Success, along with some JSON output.
## Create IP addresses for your application
<div class="important icon">
While the Fly.io GraphQL endpoint is public, our [usage of it](https://github.com/superfly/fly-go/blob/main/resource_ip_addresses.go) is [open source](https://github.com/superfly/fly-go/blob/main/LICENSE), can be directly observed by setting `LOG_LEVEL=debug` before running `flyctl` commands, and there are no current plans to change it, be aware that this interface is not guaranteed to be stable and can change without notice. If this is a concern, consider using the [`fly ips`](https://fly.io/docs/flyctl/ips/) command instead.
</div>
The following will create a shared IPv4 address and a dedicated IPv6 address:
```json
curl -i -X POST \
  -H "Authorization: Bearer ${FLY_API_TOKEN}" \
  -H "Content-Type: application/json" \
  "https://api.fly.io/graphql" \
  -d @- <<EOF
    {
      "query": "mutation(\$input: AllocateIPAddressInput!) { allocateIpAddress(input: \$input) { app { sharedIpAddress } } }",
      "variables": {
        "input": {
          "appId": "${APP_NAME}",
          "type": "shared_v4",
          "region": ""
        }
      }
    }
EOF

curl -i -X POST \
  -H "Authorization: Bearer ${FLY_API_TOKEN}" \
  -H "Content-Type: application/json" \
  "https://api.fly.io/graphql" \
  -d @- <<EOF
    {
      "query": "mutation(\$input: AllocateIPAddressInput!) { allocateIpAddress(input: \$input) { ipAddress { id address type region createdAt } } }",
      "variables": {
        "input": {
          "appId": "${APP_NAME}",
          "type": "v6",
          "region": ""
        }
      }
    }
EOF
```
Other options include `v4` and `private_v6`.
## Create a volume
This demo uses a volume. If your application doesn't use a volume skip this step.
```json
curl -i -X POST \
  -H "Authorization: Bearer ${FLY_API_TOKEN}" \
  -H "Content-Type: application/json" \
  "${FLY_API_HOSTNAME}/v1/apps/${APP_NAME}/volumes" \
  -d '{
    "name": "data",
    "region": "iad",
    "size_gb": 1
  }'
```
Adjust the [region](https://fly.io/docs/reference/regions/#fly-io-regions) as necessary.
## Create a machine
This next part contains a lot of [properties](https://fly.io/docs/machines/api/machines-resource/#machine-config-object-properties), so first an overview:
* If you are using a volume, `region` selected must match a region in which you have an allocated but unattached volume.
* `image` specifies the image we will be running. Fly.io provides an image capable of running `npx` and `uvx`, which is sufficient to run many MCPs. If you have a custom MCP with unique requirements, you can provide your own image.
* `init` specifies the command we will be running.
* `guest` specifies the size of the machine desired.
* `mounts` specifies the volume, where it is to be mounted, and how it can grow.
* `services` defined what network services your application provides.
```json
curl -i -X POST \
  -H "Authorization: Bearer ${FLY_API_TOKEN}" \
  -H "Content-Type: application/json" \
  "${FLY_API_HOSTNAME}/v1/apps/${APP_NAME}/machines" \
  -d '{
    "region": "iad",
    "config": {
      "image": "flyio/mcp:latest",
      "init": {
        "cmd": [
          "npx",
          "-f",
          "@modelcontextprotocol/server-filesystem",
          "/data/"
        ]
      },
      "guest": {
        "cpu_kind": "shared",
        "cpus": 1,
        "memory_mb": 1024
      },
      "mounts": [
        {
          "volume": "data",
          "path": "/data",
          "extend_threshold_percent": 80,
          "add_size_gb": 1,
          "size_gb_limit": 100
        }
      ],
      "services": [
        {
          "protocol": "tcp",
          "internal_port": 8080,
          "autostop": "stop",
          "autostart": true,
          "ports": [
            {
              "port": 80,
              "handlers": [
                "http"
              ],
              "force_https": true
            },
            {
              "port": 443,
              "handlers": [
                "http",
                "tls"
              ]
            }
          ]
        }
      ]
    }
  }'
```
Note: at this time the machine is created but not yet started. It will start once it receives its first request and stop when there is a period when there are no requests.
# Accessing the MCP
Normally you would access the MCP using [`fly mcp proxy`](https://fly.io/docs/flyctl/mcp-proxy/) to create a STDIO MCP server for your MCP client, even if you are using the Machines API to deploy an existing MCP server on a Fly Machine.
But for those interested in lower level details, [`fly mcp wrap`](https://fly.io/docs/flyctl/mcp-wrap/) supports the asynchronous nature of MCP servers by requiring all requests be done via HTTP POST and all replies are returned in response to a HTTP GET request.
The following shell script will demonstrate that your MCP server is working:
```sh
curl -N https://${APP_NAME}.fly.dev/ &
process_id=$!
sleep 1
curl -i -X POST -H "Content-Type: application/json" https://${APP_NAME}.fly.dev/ -d '
{"method":"initialize","params":{"protocolVersion":"2024-11-05","capabilities":{},"clientInfo":{"name":"claude-ai","version":"0.1.0"}},"jsonrpc":"2.0","id":0}
{"jsonrpc":"2.0","method":"tools/list","id":1}
{"jsonrpc":"2.0","method":"tools/call","params":{"name":"list_directory","arguments":{"path":"/data"}},"id":2}
'
sleep 1
kill $process_id
```
Note that even with the `sleep` commands present, there is no retry logic in this script. What this means is that you may not see replies the first time you run the script, especially if your machine has not yet been started. Simply run the script again if this happens.
## Performance Considerations
While the Machines API is the most performant way to create machines, there still are some considerations you need to be aware of.
* Differences in performance of otherwise similar operations:
* Starting a machine that is suspended is faster than starting a machine that is stopped.
* Starting a machine that is stopped is faster than updating a machine.
* Updating a machine is faster than creating a new machine.
* There are [rate limits](https://fly.io/docs/machines/api/working-with-machines-api/#rate-limits) in place.
Taken together, if you are anticipating running hundreds or even thousands of machines, it makes sense to create them over a period of time and then having them start when needed.
Machines API
The Machines API is a low level interface that provides access to the full range of platform services.
It consists of a set of REST and a GraphQL interfaces. You can access these from any programming language
capable of producing HTTP GET and POST requests and the ability to generate and parse JSON.
An example of when you would want to use the Machines API is when you want to create a Per-User Dev Environment
This guide presumes that you are running MacOS, Linux, or WSL2, and have curl installed.
Select an organization
All Fly.io users have a personal organization and may be a member of other organizations. Set an environment variable with your choice.
export ORG="personal"
Organization token
To get started, you need an organization token, which you can obtain via the dashboard.
Go to https://fly.io/dashboard, change the organization if necessary, select Tokens from the list on the left hand side of the page, optionally enter a token name or an expiration period and click on Create Organization token. Once complete you should see something like the following:
Click on Copy to clipboard, and then run the following command with your token pasted inside the quotes:
Response should be a 200 Success, along with some JSON output.
Create IP addresses for your application
While the Fly.io GraphQL endpoint is public, our usage of it is open source, can be directly observed by setting LOG_LEVEL=debug before running flyctl commands, and there are no current plans to change it, be aware that this interface is not guaranteed to be stable and can change without notice. If this is a concern, consider using the fly ips command instead.
The following will create a shared IPv4 address and a dedicated IPv6 address:
This next part contains a lot of properties, so first an overview:
If you are using a volume, region selected must match a region in which you have an allocated but unattached volume.
image specifies the image we will be running. Fly.io provides an image capable of running npx and uvx, which is sufficient to run many MCPs. If you have a custom MCP with unique requirements, you can provide your own image.
init specifies the command we will be running.
guest specifies the size of the machine desired.
mounts specifies the volume, where it is to be mounted, and how it can grow.
services defined what network services your application provides.
Note: at this time the machine is created but not yet started. It will start once it receives its first request and stop when there is a period when there are no requests.
Accessing the MCP
Normally you would access the MCP using fly mcp proxy to create a STDIO MCP server for your MCP client, even if you are using the Machines API to deploy an existing MCP server on a Fly Machine.
But for those interested in lower level details, fly mcp wrap supports the asynchronous nature of MCP servers by requiring all requests be done via HTTP POST and all replies are returned in response to a HTTP GET request.
The following shell script will demonstrate that your MCP server is working:
Note that even with the sleep commands present, there is no retry logic in this script. What this means is that you may not see replies the first time you run the script, especially if your machine has not yet been started. Simply run the script again if this happens.
Performance Considerations
While the Machines API is the most performant way to create machines, there still are some considerations you need to be aware of.
Differences in performance of otherwise similar operations:
Starting a machine that is suspended is faster than starting a machine that is stopped.
Starting a machine that is stopped is faster than updating a machine.
Updating a machine is faster than creating a new machine.
Taken together, if you are anticipating running hundreds or even thousands of machines, it makes sense to create them over a period of time and then having them start when needed.
