
In this post, we’ll develop a dynamic list component using the new LiveView Streams and the enhanced form features introduced in LiveView 0.18/0.19. Get ready to discover how to create a responsive list component with interactive capabilities like adding, editing, and deleting items. Fly.io is a great place to run your Phoenix LiveView applications! Check out how to get started!
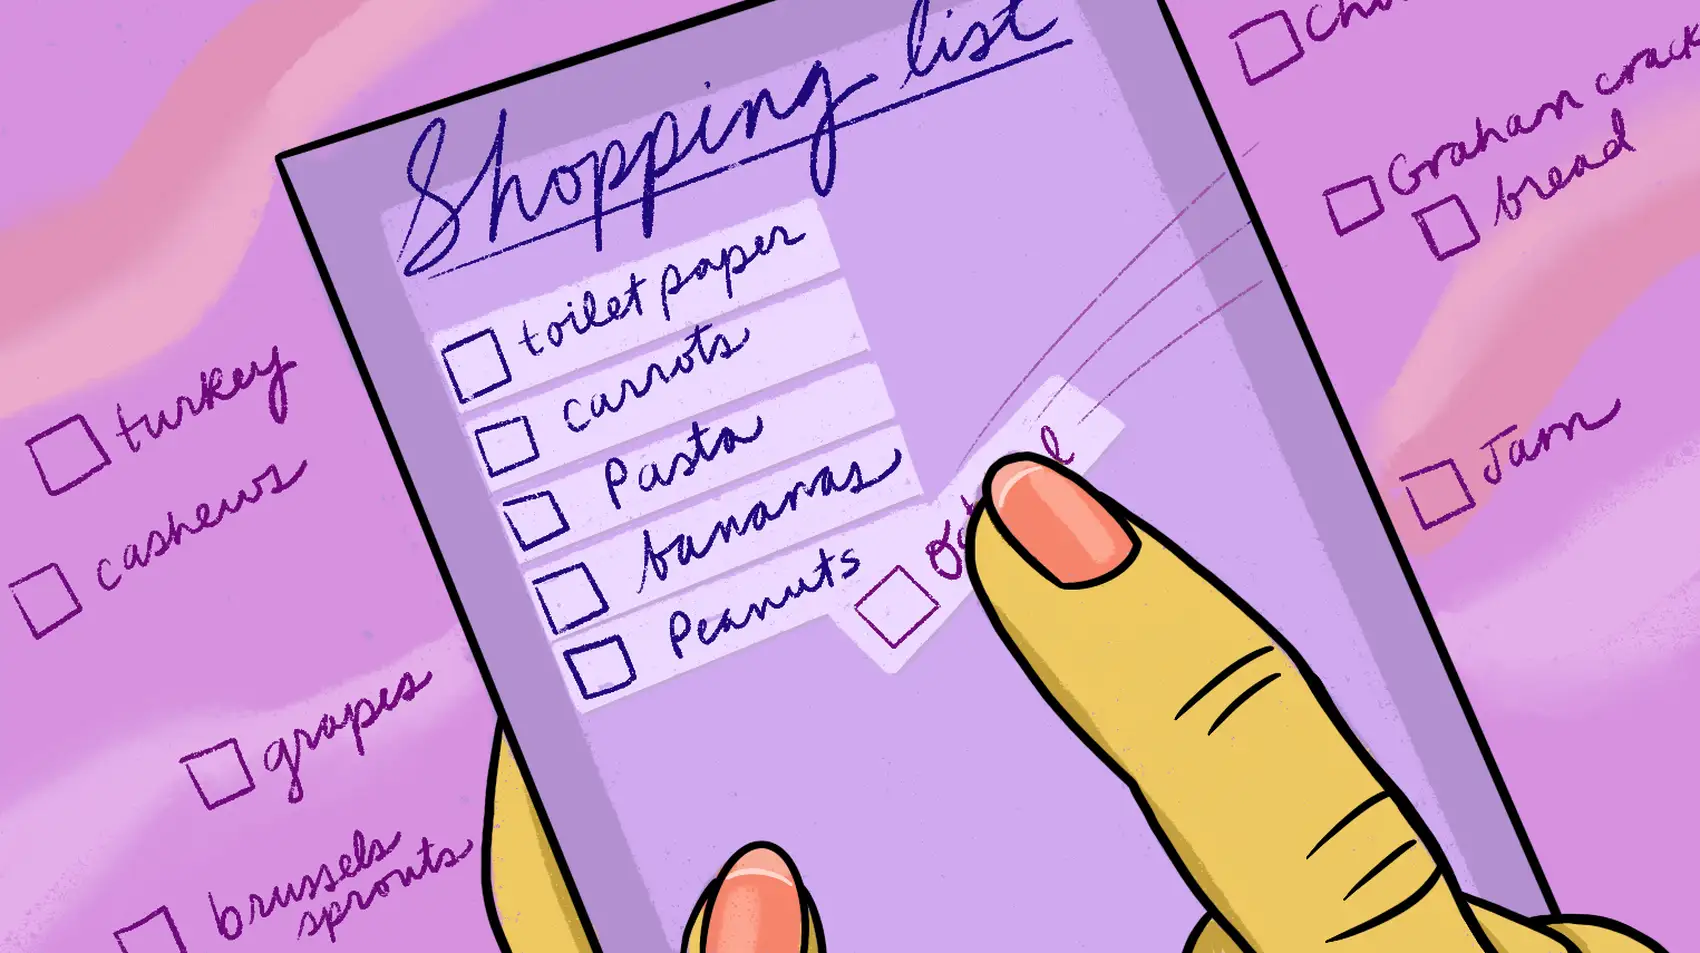
You developed a component that lets you add and remove items in a “has_many” relationship. Take, for example, a shopping list where it can have many items. You’ve got a cool form that lets you send data for new items, and it works really well:
However, you’re still not entirely happy with the result. When you make a mistake while adding an item to the list, there’s no way to edit it. How can you make the list items editable right in the list component, without the need for a modal?
Well, what if we use individual forms for each list item instead of a single form to add and associate them with the list? That’s a simple task, we can render as many forms as we want. We’re going to use the to_form/2 function to create form structs from changesets, and then we’re going to use those structs to render our form components.
And another thing: once we’ve fixed up our form component, we’re going to see how to use LiveView Streams to manage and manipulate our list items without the need to store them all in memory. Adding, editing, deleting, and resetting items in a collection has never been easier!
Defining our component’s markup
Let’s begin by refactoring our component and keeping only the header:
defmodule ComponentsExamplesWeb.ListComponent do
  use ComponentsExamplesWeb, :live_component

  def render(assigns) do
    ~H"""
    <div class="bg-gray-100 py-4 rounded-lg">
      <div class="space-y-5 mx-auto max-w-7xl px-4 space-y-4">
        <.header>
          <%= @list_name %>
        </.header>
      </div>
    </div>
    """
  end

  def update(%{list: list} = assigns, socket) do
    socket =
      socket
      |> assign(
        list_id: list.id,
        list_name: list.title
      )
    {:ok, socket}
  end
end
In the assigns, we’re passing a struct list. It contains an id, a title, and a list of items, each of which has multiple attributes.
To generate these structs, their corresponding changesets, and the context functions that we’ll be using later, you can use the phx.gen.context generator:
mix phx.gen.context SortableList List lists title:string
mix phx.gen.context SortableList Item items name:string position:integer list_id:integer
Here’s an example list, containing a single item:
%ComponentsExamples.SortableList.List{
  __meta__: #Ecto.Schema.Metadata<:loaded, "lists">,
  id: 1,
  title: "Shopping list 1",
  items: [
    %ComponentsExamples.SortableList.Item{
      __meta__: #Ecto.Schema.Metadata<:loaded, "items">,
      id: 161,
      name: "chocolate",
      position: 0,
      status: :started,
      list_id: 1,
      list: #Ecto.Association.NotLoaded<association :list is not loaded>,
      inserted_at: ~N[2023-05-16 20:29:12],
      updated_at: ~N[2023-05-16 20:29:12]
    }
  ],
  inserted_at: ~N[2023-04-25 19:35:09],
  updated_at: ~N[2023-04-25 19:35:09]
}
Now, we need to iterate over the items of the list and render the forms. But before we dive into that, let’s update our assigns to include a form per item:
def update(%{list: list} = assigns, socket) do
+ item_forms = Enum.map(list.items, &build_item_form(&1, %{list_id: list.id}))

  socket =
    socket
    |> assign(
      list_id: list.id,
      list_name: list.title,
+     items: item_forms
    )
  {:ok, socket}
end
Let’s see the content of the build_item_form/1 function:
defp build_item_form(item_or_changeset, params) do
  changeset =
    item_or_changeset
    |> SortableList.change_item(params)

  to_form(changeset, id: "form-#{changeset.data.list_id}-#{changeset.data.id}")
end
We receive an %Item{} and create a changeset from it. Then, we use the Phoenix.Component.html.to_form/2 function. This handy function converts a data structure into a Phoenix.HTML.Form, which we can use to render our form/1 components. Note that the id of the form has the list_id and the id of the item interpolated.
Check out how to_form/2 allows change tracking on individual inputs in our forms!
As a result, we have an assign called :items that holds the Phoenix.HTML.Form structs containing our element data. We iterate through each item in our assign and render a simple_form/1 for each of them:
You can find the simple_form/1 component—and many others—in core_component.ex
def render(assigns) do
  ~H"""
  <div class="bg-gray-100 py-4 rounded-lg">
    <div class="space-y-5 mx-auto max-w-7xl px-4 space-y-4">
      <.header>
        <%= @list_name %>
      </.header>
+     <div id={"#{@list_id}-items"} class="grid grid-cols-1 gap-2">
+      <div :for={form <- @items} id={"list#{@list_id}-item#{item.id}"}>
+       <.simple_form
+           for={form}
+           phx-change="validate"
+           phx-submit="save"
+           phx-target={@myself}
+           class="min-w-0 flex-1 drag-ghost:opacity-0"
+           phx-value-id={form.data.id}
+         >
+          <div class="flex">
+          </div>
+         </.simple_form>
        </div>
      </div>
    </div>
  </div>
  """
end
We define the events triggered on change or data submission, and we pass the item ID to these events using the phx-value-* bindings.
Tip: Make sure you’re using LiveView 0.19 or a newer version, as it was not possible to send phx-value-* values with forms before this update.
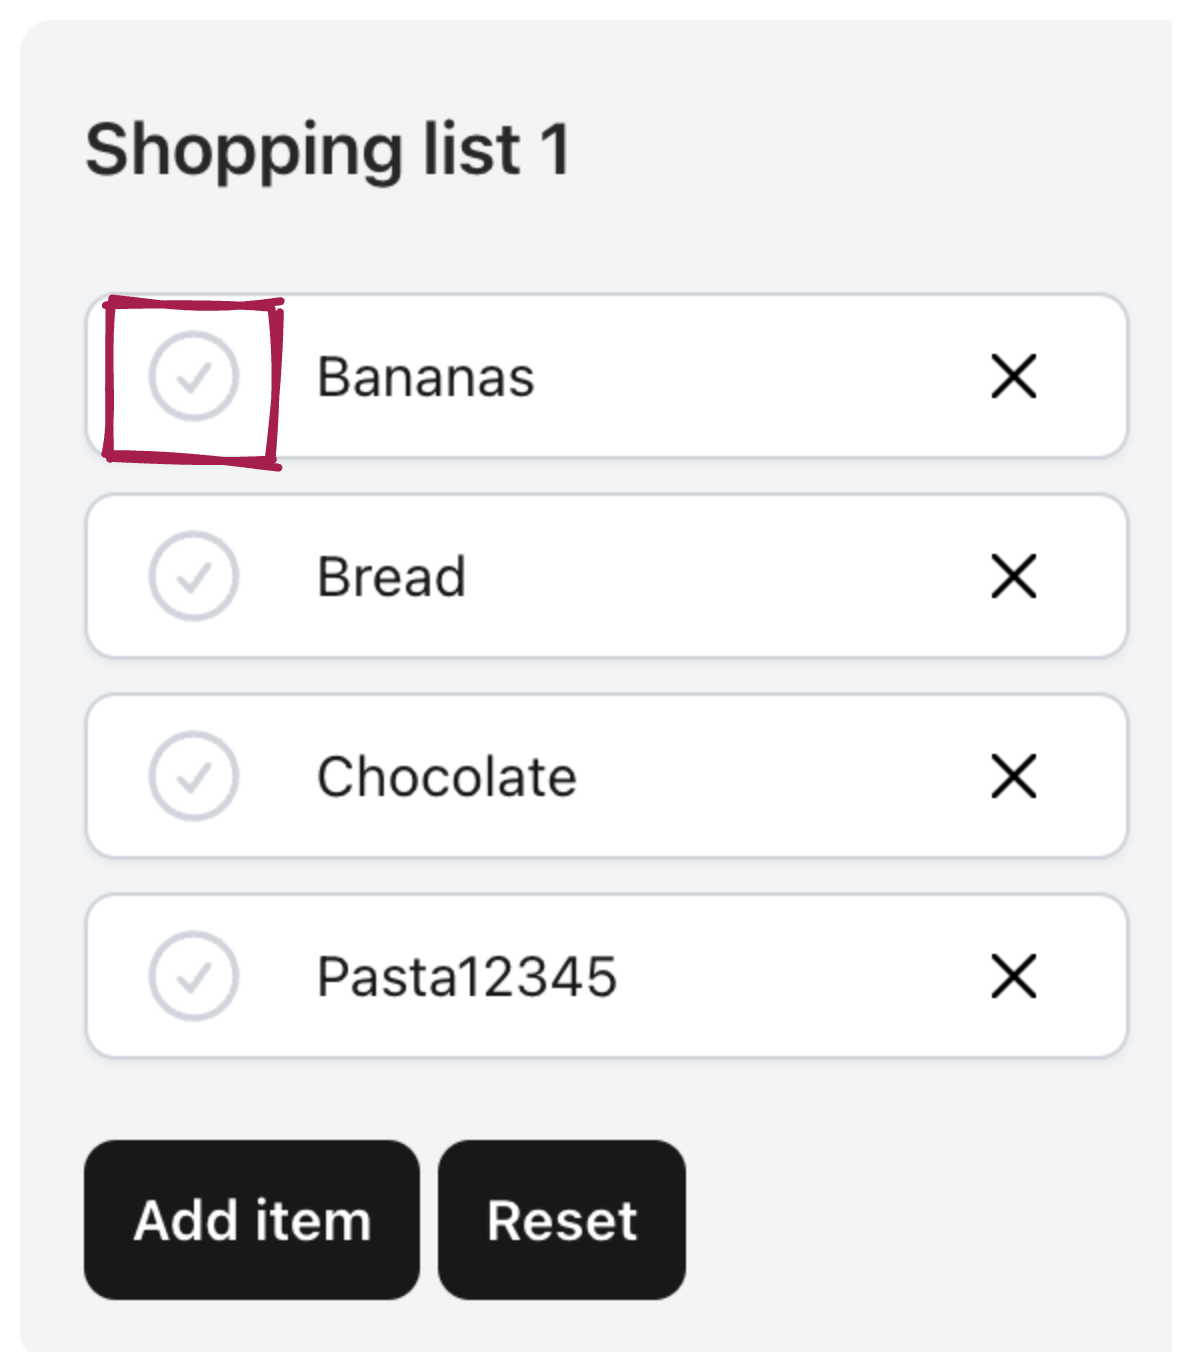
Now, let’s add elements to the body of our item form. We start by adding a button to change the status of our element:
def render(assigns) do
  ~H"""
  <div class="bg-gray-100 py-4 rounded-lg">
    <div class="space-y-5 mx-auto max-w-7xl px-4 space-y-4">
      <.header>...</.header>
      <div id={"#{@list_id}-items"} class="grid grid-cols-1 gap-2">
        <div :for={form <- @items} id={"list#{@list_id}-item#{item.id}"}>
          <.simple_form ...>
            <div class="flex">
+.            <button
+               :if={form.data.id}
+               type="button"
+               class="w-10"
+.              phx-click={JS.push("toggle_complete", target: @myself, value: %{id: form.data.id})}
+             >
+               <.icon
+                 name="hero-check-circle"
+                 class={[
+                   "w-7 h-7",
+.                  if(form[:status].value == :completed,
+                     do: "bg-green-600",
+                     else: "bg-gray-300")
+                 ]}
+               />
+.            </button>
            </div>
          </.simple_form>
        </div>
      </div>
    </div>
  </div>
  """
end
This button is displayed conditionally when the list element has an id, indicating that it already exists in the database and its status can be edited. Additionally, we apply conditional classes to the <.icon> based on the item’s status, to change its color.
Now, let’s add the most important part, the text input to to edit each list item:
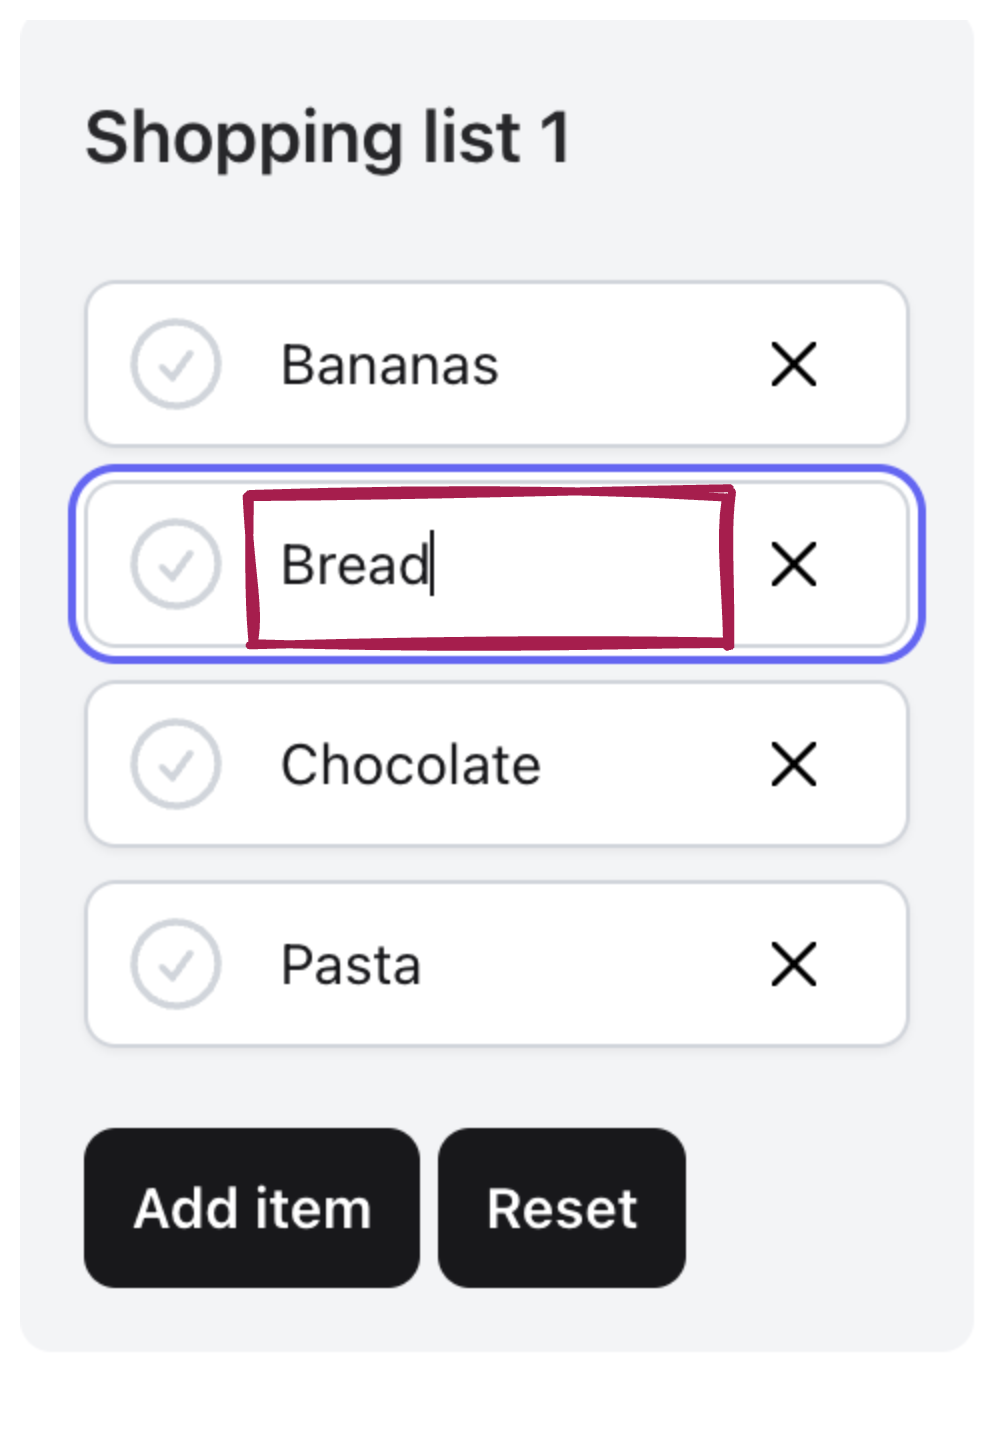
We add two text inputs to send the parameters of our item: the :name and the :list_id to which it belongs:
def render(assigns) do
  ~H"""
  <div class="bg-gray-100 py-4 rounded-lg">
    <div class="space-y-5 mx-auto max-w-7xl px-4 space-y-4">
      <.header>...</.header>
      <div id={"#{@list_id}-items"} class="grid grid-cols-1 gap-2">
        <div :for={form <- @items} id={"list#{@list_id}-item#{item.id}"}>
          <.simple_form ...>
            <div class="flex">
              ...
+             <div class="flex-auto block text-sm leading-6 text-zinc-900">
+               <input type="hidden" name={form[:list_id].name} value={form[:list_id].value} />
+               <.input
+                 field={form[:name]}
+                 type="text"
+                 phx-target={@myself}
+                 phx-key="escape"
+                 phx-keydown={
+                   !form.data.id &&
+                     JS.push("discard", target: @myself, value: %{list_id: @list_id})
+                 }
+                 phx-blur={form.data.id && JS.dispatch("submit", to: "##{form.id}")}
+               />
+             </div>
            </div>
          </.simple_form>
        </div>
      </div>
    </div>
  </div>
  """
end
Let’s take a closer look at the elements we added. First, we include a hidden input field to store the id of the list to which the element belongs. This allows us to send it as part of the parameters for the validate and save events by setting the value={form[:list_id].value} attribute.
Next, we introduce a slightly more complex <.input> component with event options. By using the phx-key and phx-keydown attributes, we specify that pressing the escape key triggers the discard event sent to the server.
We have two ways to save changes: pressing Enter to trigger the submit event or allowing changes to be automatically saved when the input loses focus.
For elements that already exist in the database and are modified, the phx-blur binding comes into play. It automatically submits the form when the input loses focus, ensuring that changes are saved seamlessly.
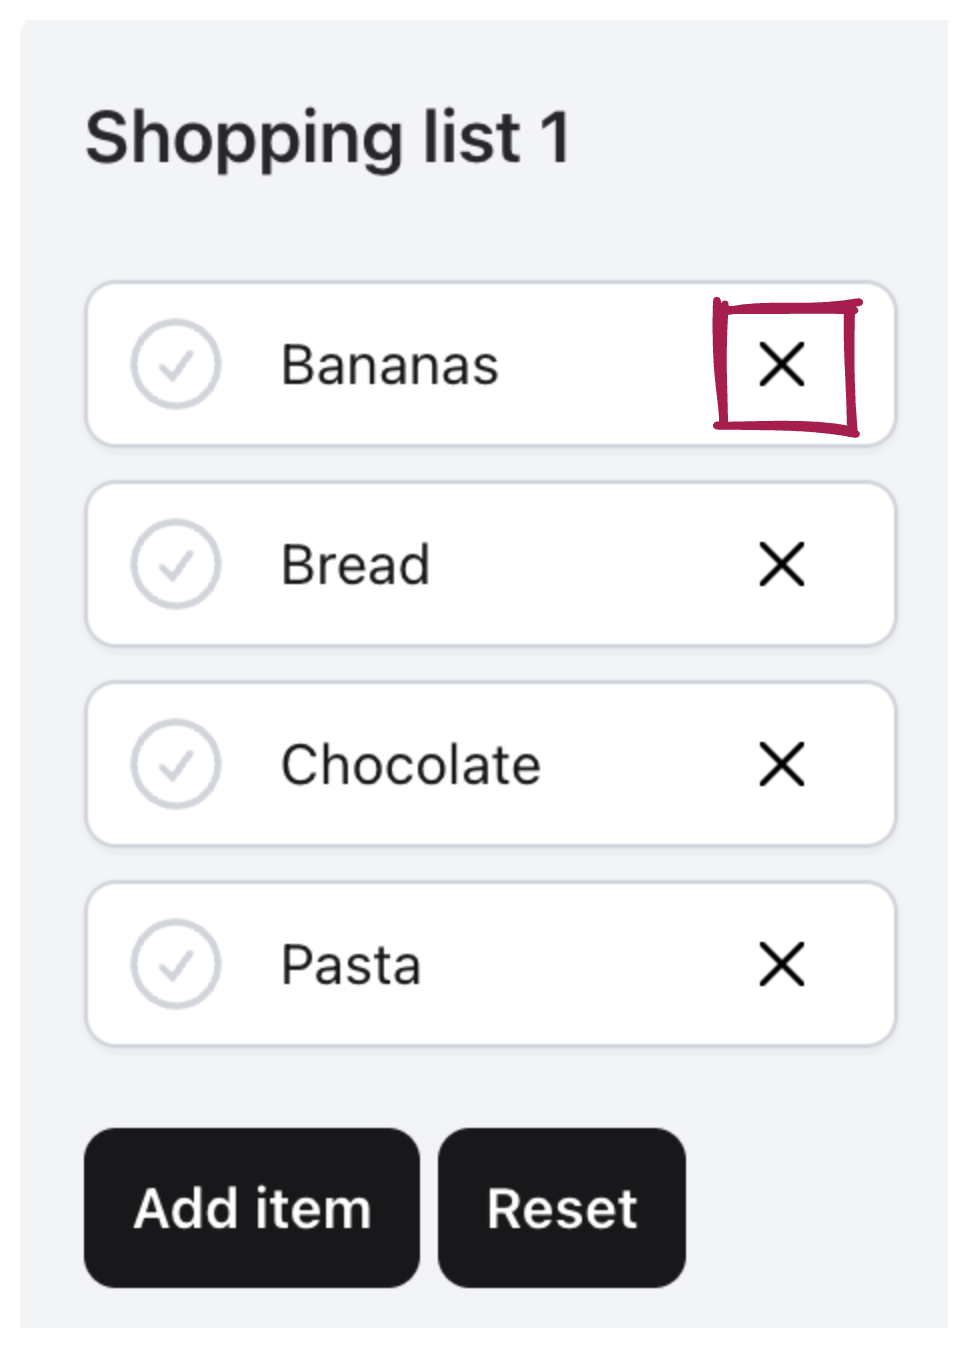
Lastly, we add a button with an icon to delete existing elements from the database:
def render(assigns) do
  ~H"""
  <div class="bg-gray-100 py-4 rounded-lg">
    <div class="space-y-5 mx-auto max-w-7xl px-4 space-y-4">
      <.header>...</.header>
      <div id={"#{@list_id}-items"} class="grid grid-cols-1 gap-2">
        <div :for={form <- @items} id={"list#{@list_id}-item#{item.id}"}>
          <.simple_form ...>
            <div class="flex">
              ...
+             <button
+               :if={form.data.id}
+               type="button"
+               class="w-10 -mt-1 flex-none"
+               phx-click={
+                 JS.push("delete", target: @myself, value: %{id: form.data.id})
+                 |> hide("#list#{@list_id}-item#{form.data.id}")
+               }
+             >
+               <.icon name="hero-x-mark" />
+             </button>
            </div>
          </.simple_form>
        </div>
      </div>
    </div>
  </div>
  """
end
We trigger the delete event while simultaneously hiding the form of the item we wish to remove.
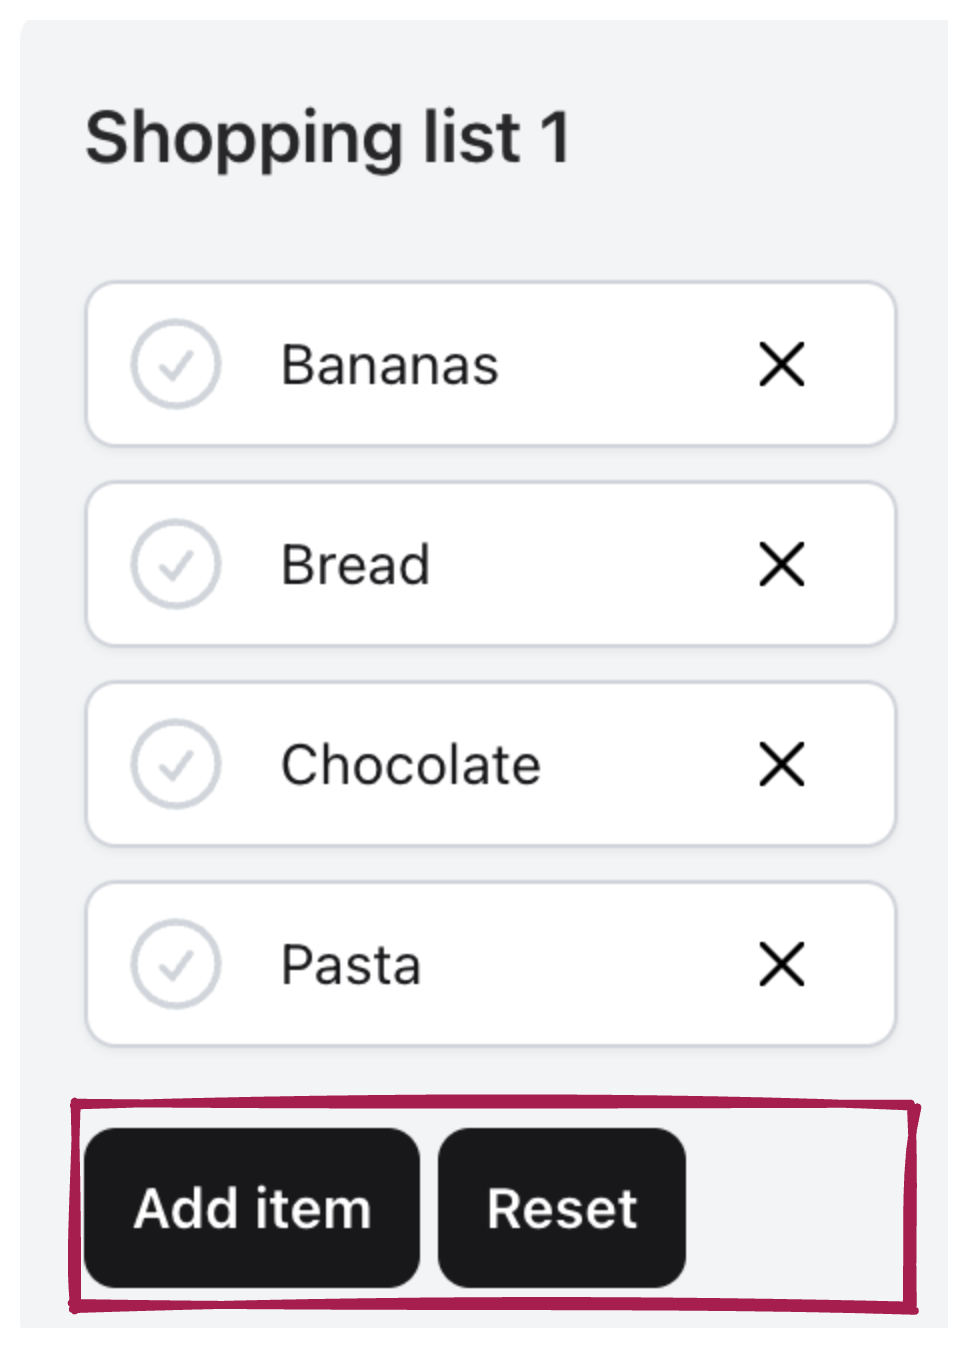
We now add the final section to our component. We include two buttons: one to add a new item to the list, and another to delete all items from the list.
def render(assigns) do
  ~H"""
  <div class="bg-gray-100 py-4 rounded-lg">
    <div class="space-y-5 mx-auto max-w-7xl px-4 space-y-4">
      <.header>...</.header>
      <div id={"#{@list_id}-items"} class="grid grid-cols-1 gap-2">
        <div :for={form <- @items} id={"list#{@list_id}-item#{item.id}"}>
          ...
        </div>
      </div>
+     <.button phx-click={JS.push("new", target: @myself, value: %{list_id: @list_id})} class="mt-4">
+       Add item
+     </.button>
+     <.button
+       phx-click={JS.push("reset", target: @myself, value: %{list_id: @list_id})}
+       class="mt-4"
+     >
+       Reset
+     </.button>
    </div>
  </div>
  """
end
We sent events to the server using JS.push. Both the reset and new events receive the list_id as a parameter.
Awesome! We’ve finished the markup for our component!
We can easily render it by passing a list struct like the one we saw above:
def render(assigns) do
  ~H"""
  <div id="lists" class="grid sm:grid-cols-1 md:grid-cols-3 gap-2">
    <.live_component
      :for={list <- @lists}
      module={ComponentsExamplesWeb.ListComponent}
      id={list.id}
      list={list}
    />
  </div>
  """
end
But before we tackle handling all the events we defined, how about we optimize memory usage by using Streams? With just a few tweaks, we can implement this feature and ensure we’re not storing all the list elements in memory.
Converting to Streams
To optimize memory usage, let’s start by making a small change to our assigns. We assign the stream items using the stream/4 function:
def update(%{list: list} = assigns, socket) do
  item_forms = Enum.map(list.items, &build_item_form(&1, %{list_id: assigns.id}))

  socket =
    socket
    |> assign(
      list_id: list.id,
      list_name: list.title,
-     items: item_forms
    )
+   |> stream(:items, item_forms)

  {:ok, socket}
end
Next, we define the required phx-update DOM attribute on the parent container where the item collection is rendered. The items are now accessed via the new assign @streams, and we consume the stream using a comprehension:
def render(assigns) do
  ~H"""
  <div class="bg-gray-100 py-4 rounded-lg">
    <div class="space-y-5 mx-auto max-w-7xl px-4 space-y-4">
      ...
-      <div id={"#{@list_id}-items"} class="grid grid-cols-1 gap-2">
+      <div
+        id={"#{@list_id}-items"}
+        class="grid grid-cols-1 gap-2"
+        phx-update="stream"
+      >
-        <div :for={form <- @items} id={"list#{@list_id}-item#{item.id}"}>
+        <div :for={{id, form} <- @streams.items} id={id}>
        ...
        </div>
      </div>
      ...
    </div>
  </div>
  """
end
Now we’re all set to handle the events we defined earlier!
Fly.io ❤️ Elixir
Fly.io is a great way to run your Phoenix LiveView app close to your users. It’s really easy to get started. You can be running in minutes.
Deploy a Phoenix app today! →
Add, delete, update, reset Streams
We’ll be defining five events (new, validate, save, delete, reset). Our main focus is explain how we can use streams to reflect changes in our list. We won’t be diving into functions that interact with the database.
To get started, it will be helpful to define a helper function that creates forms already associated with the list_id:
defp build_empty_form(list_id) do
  build_item_form(%Item{list_id: list_id}, %{})
end
Keep in mind this function, as well as the one we defined earlier. We’ll be using them in our upcoming steps!
New
To add a new element to the list, we can use the function we just defined to create an empty form. Then, we can insert this form into the stream using the stream_insert/4 function:
def handle_event("new", %{"list_id" => list_id}, socket) do
  {:noreply, stream_insert(socket, :items, build_empty_form(list_id), at: -1)}
end
To insert the new form at the end of the list, we use the :at option provided by the stream_insert/4 function.
Validate
To display the errors of our item, we need to modify the already rendered form in the client and insert a new form that includes the errors from the changeset.
One important detail to note is that in order for our component to recognize that it should display the changeset errors, we need to add an :action to it. To achieve this, we make a slight modification to the build_item_form/4 function that we defined earlier:
-defp build_item_form(item_or_changeset, params) do
+defp build_item_form(item_or_changeset, params, action \\ nil) do
  changeset =
    item_or_changeset
    |> SortableList.change_item(params)
+   |> Map.put(:action, action)

  to_form(changeset, id: "form-#{changeset.data.list_id}-#{changeset.data.id}")
end
The action can be any random atom, but hey, let’s keep things clear and name them sensibly.
Now let’s see how to handle the event and use this new :action parameter:
def handle_event("validate", %{"item" => item_params} = params, socket) do
  item = %Item{id: params["id"] || nil, list_id: item_params["list_id"]}
  item_form = build_item_form(item, item_params, :validate))
  {:noreply, stream_insert(socket, :items, item_form}
end
First, we generate a new %Item{} that includes the item id sent from the text input and the list_id sent using the phx-value-id={form.data.id} parameter. Next, we call our build_item_form/4 function with the :validate action and insert the item into the stream using stream_insert/4.
Like magic, we didn’t have to specify that this is an update of a form that already exists! This is because to_form created a DOM ID that allows to identify the elements of the stream that already exists in the client.
Save
When attempting to save a new item, we may receive one of two possible responses. First, when an item is successfully inserted, we clear the new item form and replace it with a fresh empty form. We also insert a new form containing the persisted data. Second, if an error occurs, we display the relevant errors to the user.
Let’s now delve into the implementation details of these actions.
def handle_event("save", %{"item" => item_params}, socket) do
  case SortableList.create_item(item_params) do
    {:ok, new_item} ->
      empty_form = build_empty_form(item_params["list_id"])


      {:noreply,
       socket
       |> stream_insert(:items, build_item_form(new_item, %{}))
       |> stream_delete(:items, empty_form)
       |> stream_insert(:items, empty_form)}

    {:error, changeset} ->
      {:noreply, assign(socket, :form, build_item_form(changeset, %{}, :insert)))}
  end
end
Great! We can chain together the different functions of the stream using the pipeline operator.
On the other hand, the save event may be triggered by one of the forms that have already been saved in the database, indicating an update of the item. We can identify this by pattern matching, receiving a non-null item_id:
def handle_event("save", %{"id" => item_id, "item" => params}, socket) do
  todo = SortableList.get_item!(item_id)

  case SortableList.update_item(todo, params) do
    {:ok, updated_item} ->
      {:noreply, stream_insert(socket, :items, build_item_form(updated_item, %{}))}

    {:error, changeset} ->
      {:noreply, stream_insert(socket, :items, build_item_form(changeset, %{}, :update))}
  end
end
It’s almost like magic, isn’t it? We just need to use stream_insert, and the stream takes care of updating itself. And if we want to display the errors from the changeset, we simply add an :action to it.
Delete
Deleting items from a stream is easy too!
For this we have stream_delete/3 which also receives changesets as a parameter:
def handle_event("delete", %{"id" => item_id}, socket) do
  item = SortableList.get_item!(item_id)
  {:ok, _} = SortableList.delete_item(item)
  {:noreply, stream_delete(socket, :items, build_item_form(item, %{}))}
end
You can also use the stream_delete/3 function to discard the form of the new element when needed:
def handle_event("discard", params, socket) do
  {:noreply, stream_delete(socket, :items, build_empty_form(params["list_id"]))}
end
Reset
We have the option to remove all items from a stream, which is perfect for our reset button:
def handle_event("reset", params, socket) do
  empty_form = build_empty_form(params["list_id"])
  {:noreply, stream(socket, :items, [empty_form], reset: true)}
end
We simply need to reconfigure our stream by passing the option reset: true. Additionally, we can include a list of new elements to be inserted, which in this case would be at least one empty form.
LiveView 0.19 added support for stream resets with bulk insert operations!
Hooray! We’ve done it! Our component is now complete and ready to shine!
Closing
The features we explored today unlock a world of exciting new possibilities for apps development with LiveView. LiveView Streams revolutionize collection handling and memory optimization, simplifying tasks such as adding, editing, and deleting items. Furthermore, the optimizations brought by to_form/1 enable efficient manipulation of individual inputs without the need for full form re-rendering. This simple yet immensely powerful function opens up new avenues for form usage, expanding the potential of your applications.
Check out this repo to see these game-changing features in action. We used our previous learnings to create an even more impressive component!
Credits
A big shoutout to Chris McCord for sharing the incredible example that inspired these posts and for patiently answering any questions about the exciting new concepts in Phoenix and LiveView.