
Tables have always played an essential role in the history of web development. Decades ago, tables lived their golden age; they were used not only to structure data but also for the layout of web pages. It was easy to arrange things with tables, a <tr> here, a <td> there, and everything was in the proper position.
With the desire to develop responsive and accessible websites and because of CSS’ growing feature set, tables are finally used for the purpose that they were originally created: displaying structured data.
Tables can be far more complex than we might think. To break down the complexity, we can make a component that can be reused throughout a project and also help create a unified look and user experience.
These are the goals with our table component:
- columns are customizable for different kinds of data
- columns can be custom styled
- can be paginated
- can be sorted by columns
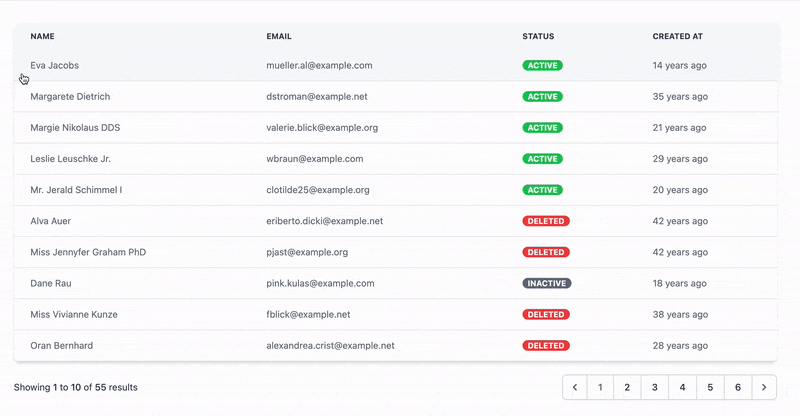
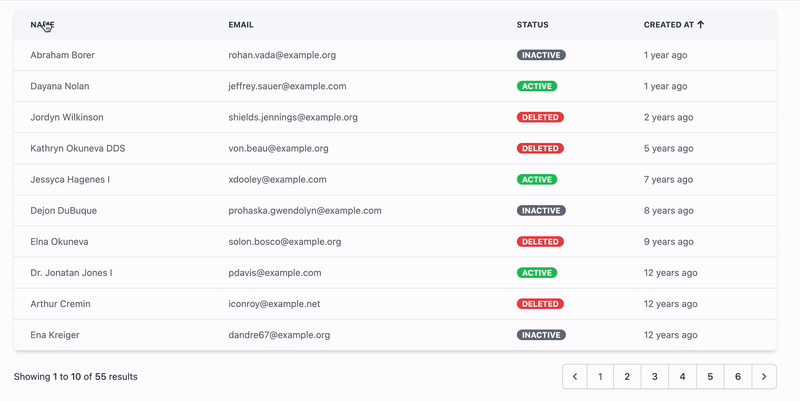
Here’s a quick look at what we want to build by the end of this:
The component is meant to be re-usable. To accomplish this, we’ll create an abstract Table component, and a helper Column class. Combined, these will help us quickly scaffold useful tables in our app.
Prepare some example data
First, let’s create a new Laravel project, install Livewire using composer, and install Tailwind using npm.
For this example, we will create a user table. To store the data we want, let’s edit the create_users_table migration and add these lines:
Schema::create('users', function (Blueprint $table) {
    ...
    $table->string('avatar');
    $table->string('status');
    $table->string('country');
    ...
});
Let’s also edit the UserFactory class to generate some nice fake data for us.
public function definition()
{
    return [
        ...
        'avatar' => $this->faker->imageUrl(40,40),
        'status' => $this->faker->randomElement(['active','inactive','deleted']),
        'country' => $this->faker->country,
    ];
}
Next, let’s edit the DatabaseSeeder class to create 55 users.
public function run()
{
  \App\Models\User::factory(55)->create();
}
When we run the command php artisan migrate:refresh --seed, it will refresh and seed our database.
Great! We’ve got our database structure ready and our dev database is populated with realistic looking fake user data. Time to start on the component!
Creating the table component
First, let’s create an abstract component, called Table. That will handle the basic functionality of the table. We can extend different kinds of tables from that.
Let’s start by running: php artisan make:livewire table
We change the Table class to abstract and add two abstract functions called query() and columns(). Also, we’ll add a non-abstract function called data() that returns the query results.
abstract class Table extends Component
{
  ...

  public abstract function query() : \Illuminate\Database\Eloquent\Builder;

  public abstract function columns() : array;

  public function data()
  {
    return $this
      ->query()
      ->get();
  }
}
Column class
The column class is the heart of our table component. We can create a Table folder in our app directory, and create the Column class here. (It can go anywhere in your projects, it depends on how you structure your code.)
Let’s add a $component property to the class. It describes the component that should be rendered to display column data. We can override this to customize it.
We’ll also add a __construct($key, $label) function that sets two properties. By creating a static make() function, we can use our class as a fluent API that enables method chaining.
After those changes, this is how our class looks:
class Column
{
  public string $component = 'columns.column';

  public string $key;

  public string $label;

  public function __construct($key, $label)
  {
      $this->key = $key;
      $this->label = $label;
  }

  public static function make($key, $label)
  {
      return new static($key, $label);
  }
}
As you can see, we set $component to 'columns.column' . To make this work, we need to create this component as resources/views/components/columns/column.blade.php
The column component is responsible for displaying the data passed as a prop named value. We can make that happen in our column.blade.php component as shown below.
@props([
    'value',
])

<div>
    {{ $value }}
</div>
Making the layout of the table
Let’s focus on the table.blade.php file now.
First, we start with a simple table layout; then, we render the heading by iterating over the $this->column() array.
After that, we iterate over the $this->data() array, which currently contains our users. Using the <x-dynamic-component> helper dynamically renders the component set in the $column->component property.
<div>
  <div class="relative overflow-x-auto shadow-md rounded-lg">
    <table class="w-full text-sm text-left text-gray-500">
      <thead class="text-xs text-gray-700 uppercase bg-gray-50">
        <tr>
          @foreach($this->columns() as $column)
            <th>
              <div class="py-3 px-6 flex items-center"
                {{ $column->label }}
              </div>
            </th>
          @endforeach
        </tr>
      </thead>
      <tbody>
        @foreach($this->data() as $row)
          <tr class="bg-white border-b hover:bg-gray-50">
            @foreach($this->columns() as $column)
              <td>
                <div class="py-3 px-6 flex items-center cursor-pointer">
                  <x-dynamic-component
                      :component="$column->component"
                      :value="$row[$column->key]"
                  >
                  </x-dynamic-component>
                </div>
              </td>
            @endforeach
          </tr>
        @endforeach
      </tbody>
    </table>
  </div>
</div>
Initializing our UsersTable
We made all the preparations needed to render our first table. Let’s make it happen.
Let’s create a UsersTable Livewire component using this command php artisan make:livewire UsersTable.
Then we’ll edit the UsersTableclass to extend from our abstract Table class. Also, let’s remove the render() function because we don’t need to override it.
class UsersTable extends Table
{
}
We created two abstract functions in our base Table class, let’s make their implementation here.
In the query() function we need to return an Eloquent\Builder that describes our data model.
public function query() : Builder
{
    return User::query();
}
In the columns() function, we need to return an array of Column instances. We’ll set the keys to match our database and the labels however we want.
public function columns() : array
{
  return [
       Column::make('name', 'Name'),
       Column::make('email', 'Email'),
       Column::make('status', 'Status'),
       Column::make('created_at', 'Created At'),
   ];
}
The last step is to render our table. For simplicity, we’ll just include it in welcome.blade.php.
<html>
    <head>
        <meta charset="utf-8">
        <meta name="viewport" content="width=device-width, initial-scale=1">

        <title>Livewire Table</title>

        <link href="{{ mix('/css/app.css') }}" rel="stylesheet">
        @livewireStyles
    </head>
    <body class="flex items-center justify-center min-h-screen">

    <div class="w-full max-w-6xl">
        <livewire:users-table></livewire:users-table>
    </div>

    @livewireScripts
    </body>
</html>
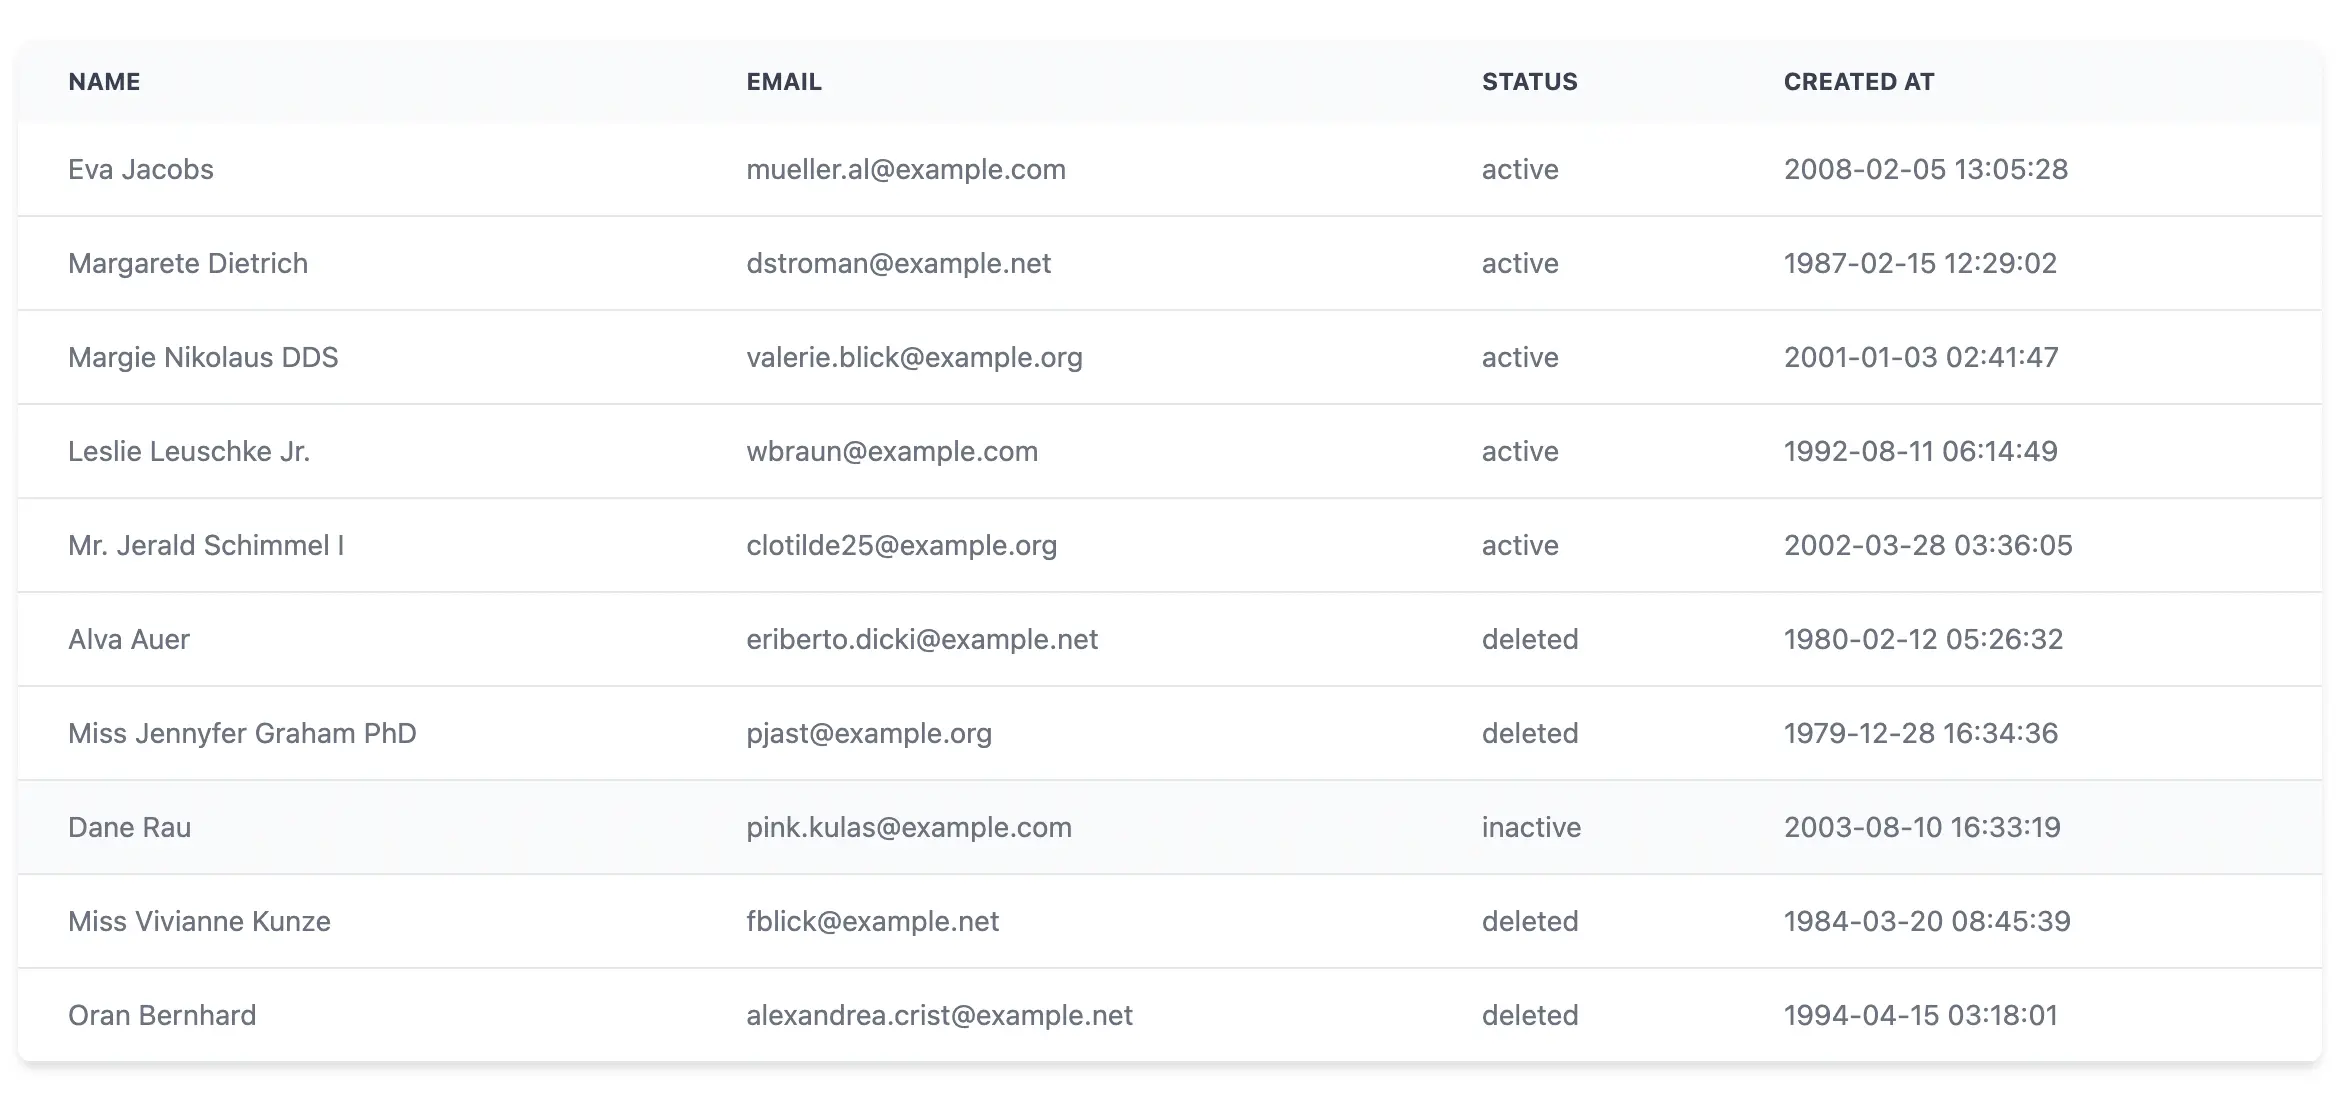
When we run it, we should see something like this. We have a working reusable table component!
Customizing column styling and data formatting
It’s a frequent requirement to apply custom styling to our columns. How would we do that?
We can create a component($component) function in our Column class, that sets our $component property.
public function component($component)
{
    $this->component = $component;

    return $this;
}
Returning with $this is a common pattern when you want to make a fluent API. Using this pattern, we can call multiple functions after each other on the same instance.
We will put the commonly used components into a folder called common in resources/views/components/columns. Create a file there called human-diff.blade.php with the following content:
@props([
    'value'
])

<div>
    {{ \Carbon\Carbon::make($value)->diffForHumans() }}
</div>
Columns that are very specific to our table can go in resources/views/components/columns/users folder. Let’s create a status column file status.blade.php that formats our status data more elegantly.
@props([
    'value'
])

<div class="flex">
    <div @class([
        'text-white rounded-xl px-2 uppercase font-bold text-xs',
        'bg-red-500' => $value === 'deleted',
        'bg-green-500' => $value === 'active',
        'bg-gray-500' => $value === 'inactive',
])>
        {{ $value }}
    </div>
</div>
Now, we’ll edit the columns() function in our UsersTable class to call the previously created component($component) function.
public function columns() : array
{
  return [
    Column::make('name', 'Name'),
    Column::make('email', 'Email'),
    Column::make('status', 'Status')->component('columns.users.status'),
    Column::make('created_at', 'Created At')->component('columns.common.human-diff'),
  ];
}
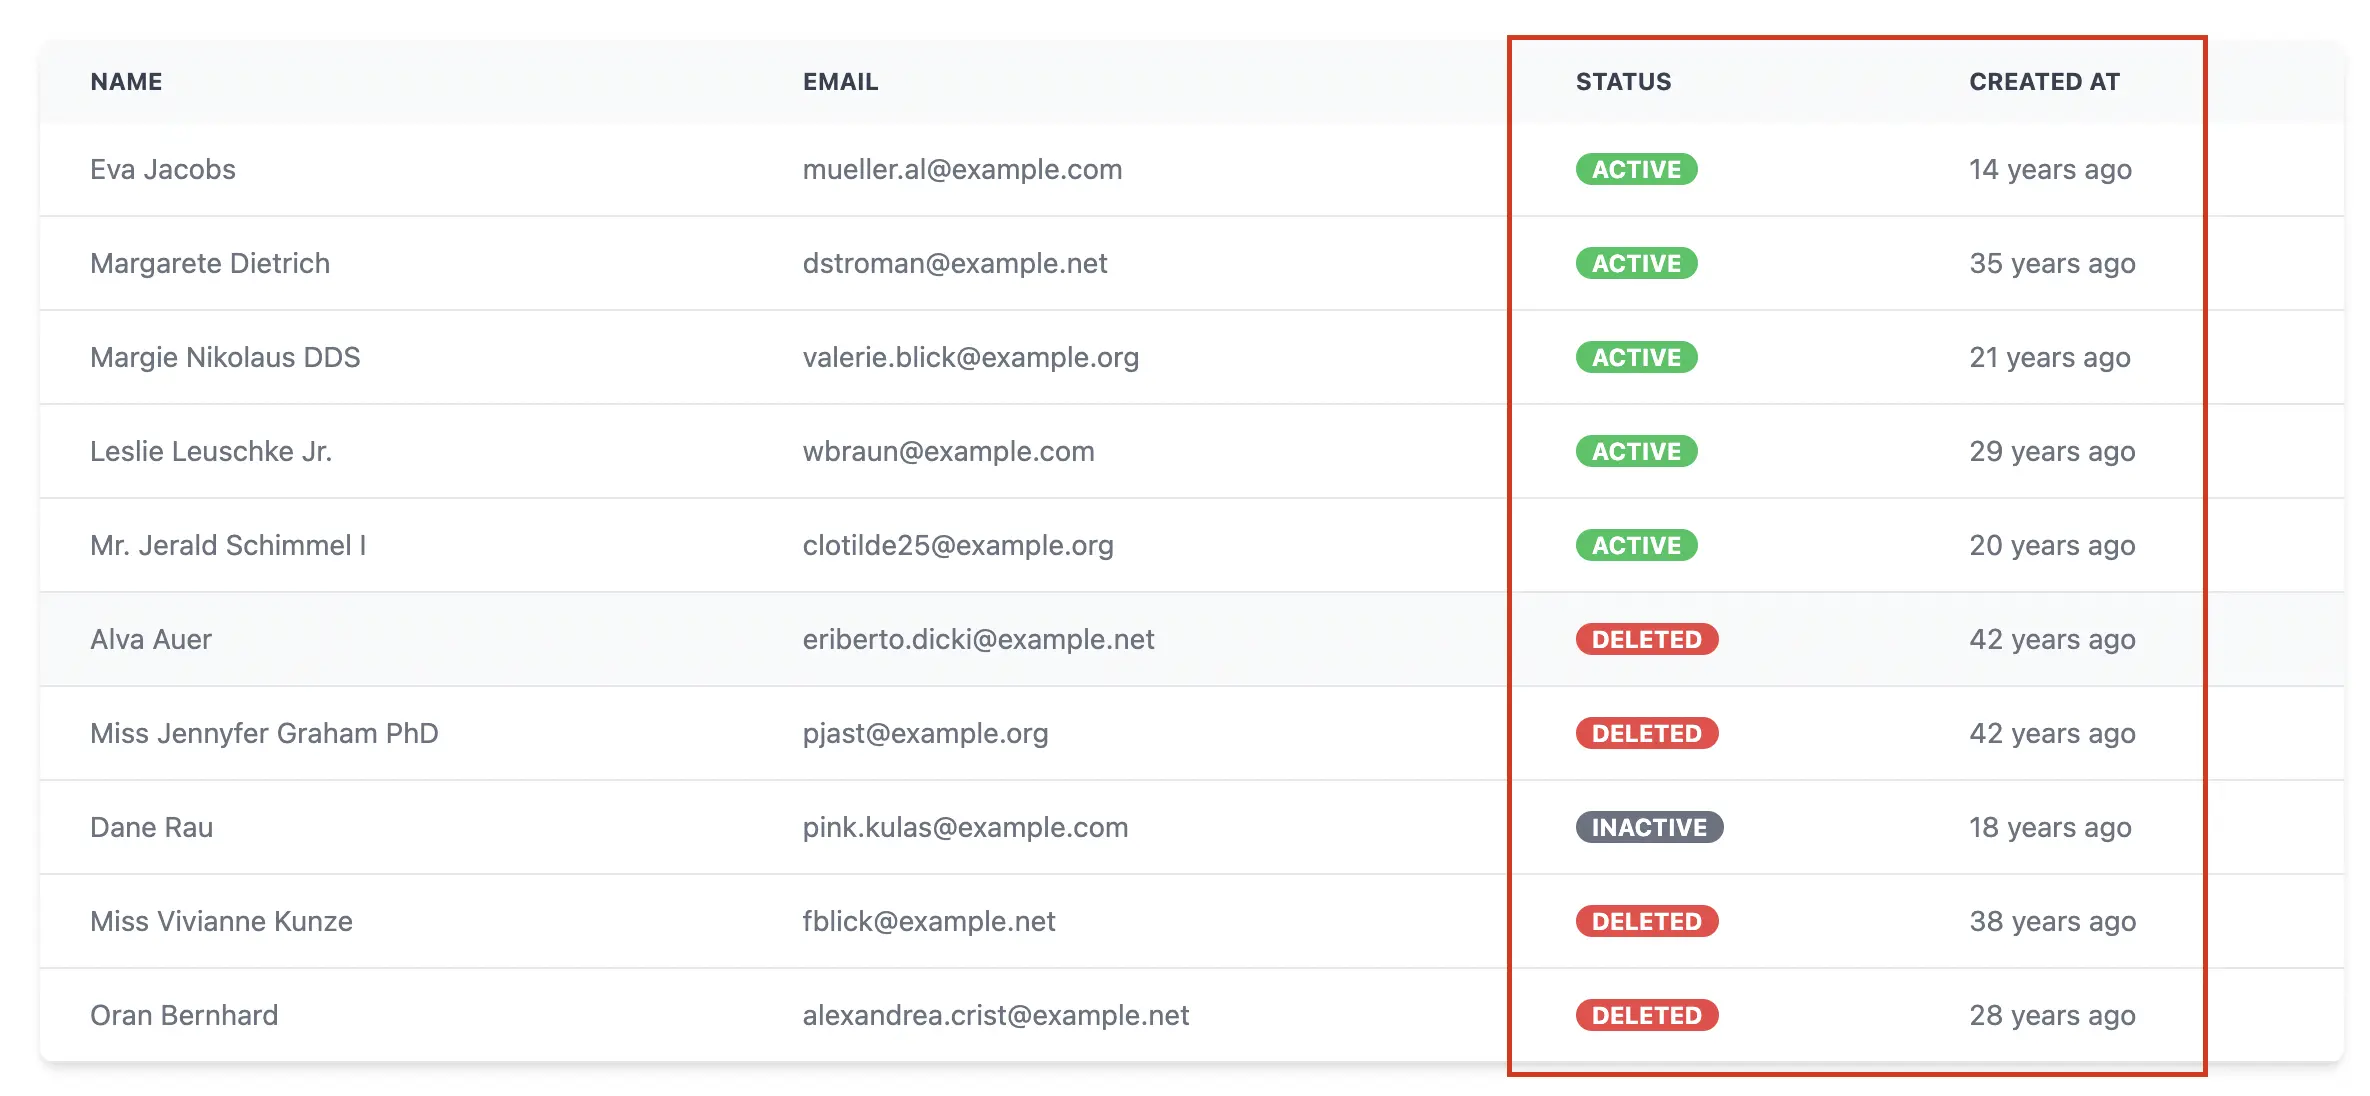
Our status column is now custom-styled, and the created_at column is showing the formatted data.
Livewire is better on Fly
Livewire apps run even smoother when you move them closer to your users. Deploy your app on Fly.io in minutes!
Deploy your Laravel app! →
Adding pagination
Livewire has a built-in pagination component that uses Tailwind CSS by default; let’s use it now.
We need to use Livewire’s WithPagination trait and add two properties to the Table class.
abstract class Table extends Component
{
  use WithPagination;

  public $perPage = 10;

  public $page = 1;

  ...
}
Let’s edit the data() function to paginate results.
public function data()
{
    return $this
        ->query()
        ->paginate($this->perPage);
}
We can include the pagination component in our table.blade.php file using $this->data()->links(). For those curious about how does this work under the hood, you can learn more in the Livewire docs.
<div class="flex flex-col gap-5">
    <div class="relative overflow-x-auto shadow-md rounded-lg">
        <table class="w-full text-sm text-left text-gray-500">
          ...
        </table>
    </div>
    {{ $this->data()->links() }}
</div>
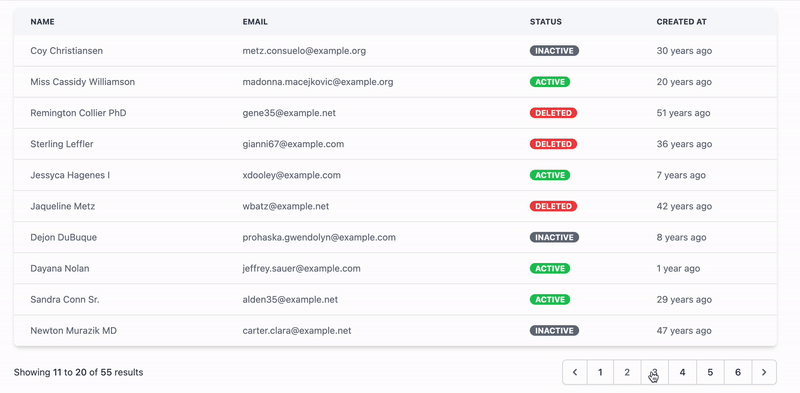
We have working pagination!
Sort the columns
In order to sort the columns, we need to make a few modifications.
First, we’ll add a $sortBy and a $sortDirection property to our Table class.
public $sortBy = '';

public $sortDirection = 'asc';
We’ll edit the data() function to add the sorting functionality with $query->orderBy().
public function data()
{
    return $this
        ->query()
        ->when($this->sortBy !== '', function ($query) {
            $query->orderBy($this->sortBy, $this->sortDirection);
        })
        ->paginate($this->perPage);
}
We need an action in our Table class that gets called when a column’s title is clicked. If the selected key matches the clicked label’s key, it reverses the direction. Otherwise, it sets the $sortBy to the clicked key, and the $sortDirection to 'asc'. It also handles page reset to operate well with pagination.
public function sort($key) {
  $this->resetPage();

  if ($this->sortBy === $key) {
      $direction = $this->sortDirection === 'asc' ? 'desc' : 'asc';
      $this->sortDirection = $direction;

      return;
  }

  $this->sortBy = $key;
  $this->sortDirection = 'asc';
}
Let’s modify the table.blade.php to add our click listener to the labels. We’ll also add icons to represent the current sorting state. We will use the icons from heroicons for that.
<th wire:click="sort('{{ $column->key }}')">
  <div class="py-3 px-6 flex items-center cursor-pointer">
    {{ $column->label }}
    @if($sortBy === $column->key)
      @if ($sortDirection === 'asc')
        <svg xmlns="http://www.w3.org/2000/svg" class="h-5 w-5" viewBox="0 0 20 20"
             fill="currentColor">
            <path fill-rule="evenodd"
                  d="M14.707 10.293a1 1 0 010 1.414l-4 4a1 1 0 01-1.414 0l-4-4a1 1 0 111.414-1.414L9 12.586V5a1 1 0 012 0v7.586l2.293-2.293a1 1 0 011.414 0z"
                  clip-rule="evenodd"/>
        </svg>
      @else
        <svg xmlns="http://www.w3.org/2000/svg" class="h-5 w-5" viewBox="0 0 20 20"
             fill="currentColor">
            <path fill-rule="evenodd"
                  d="M5.293 9.707a1 1 0 010-1.414l4-4a1 1 0 011.414 0l4 4a1 1 0 01-1.414 1.414L11 7.414V15a1 1 0 11-2 0V7.414L6.707 9.707a1 1 0 01-1.414 0z"
                  clip-rule="evenodd"/>
        </svg>
      @endif
    @endif
  </div>
</th>
Let’s sort!
Conclusion
Creating tables can be a monotonous task; using libraries like Livewire and Tailwind can speed up the process and make the development joyful. Creating a reusable component makes adding additional tables super easy.
Adding dynamic behavior without writing Javascript is where Livewire shines. With built-in helpers like pagination, we can implement solutions for complex problems with just a few lines of code. With the growing popularity of Livewire, more and more open-source packages are available daily.
With how Livewire enables dynamic behaviors without full page loads or even having to write a JSON API, you can create fast, responsive apps for your users more rapidly than before.