

Dockerfiles for JavaScript applications can range quite a bit – from two lines to fifty. What gives? This complexity can drive some developers away from really understanding this powerful tool, so today, I’d like to demystify Docker by examining a sample Dockerfile for a JavaScript application. This should be a useful resource, regardless of what JS framework you work in.
While this article will not be a comprehensive education on the subject, by the end of this article, you’ll feel much more confident in your ability to write and modify any Dockerfile to suit the needs of your app.
A quick primer on Docker vocabulary
Some vocabulary:
- Image: This contains your application code and everything needed to run it. For the most part, Docker images (or, more specifically, Open Container Initiative (OCI) images) are just a stack of filesystem layers. You can build a new image using
docker buildor with other tools like Podman. To learn more, check out the section on OCI Images in our blog post Docker without Docker. - Container: This is what actually runs your image and makes your app go zoom. You can run an existing Docker image using
docker run. Setting up your container is typically where you would define things like environment variables, which ports to expose, which protocols to allow, etc. - Instructions: These are the bits in ALLCAPS at the start of each line, followed by any number of parameters. You might hear people call them commands or statements, but they are officially called instructions.
- Layers: Almost every instruction line in a Dockerfile gets turned into a layer. These layers are the tarballs that make up the Docker image. Also, the order of these layers matters, especially for build optimization.
Make your life easy: use the Dockerfile generator
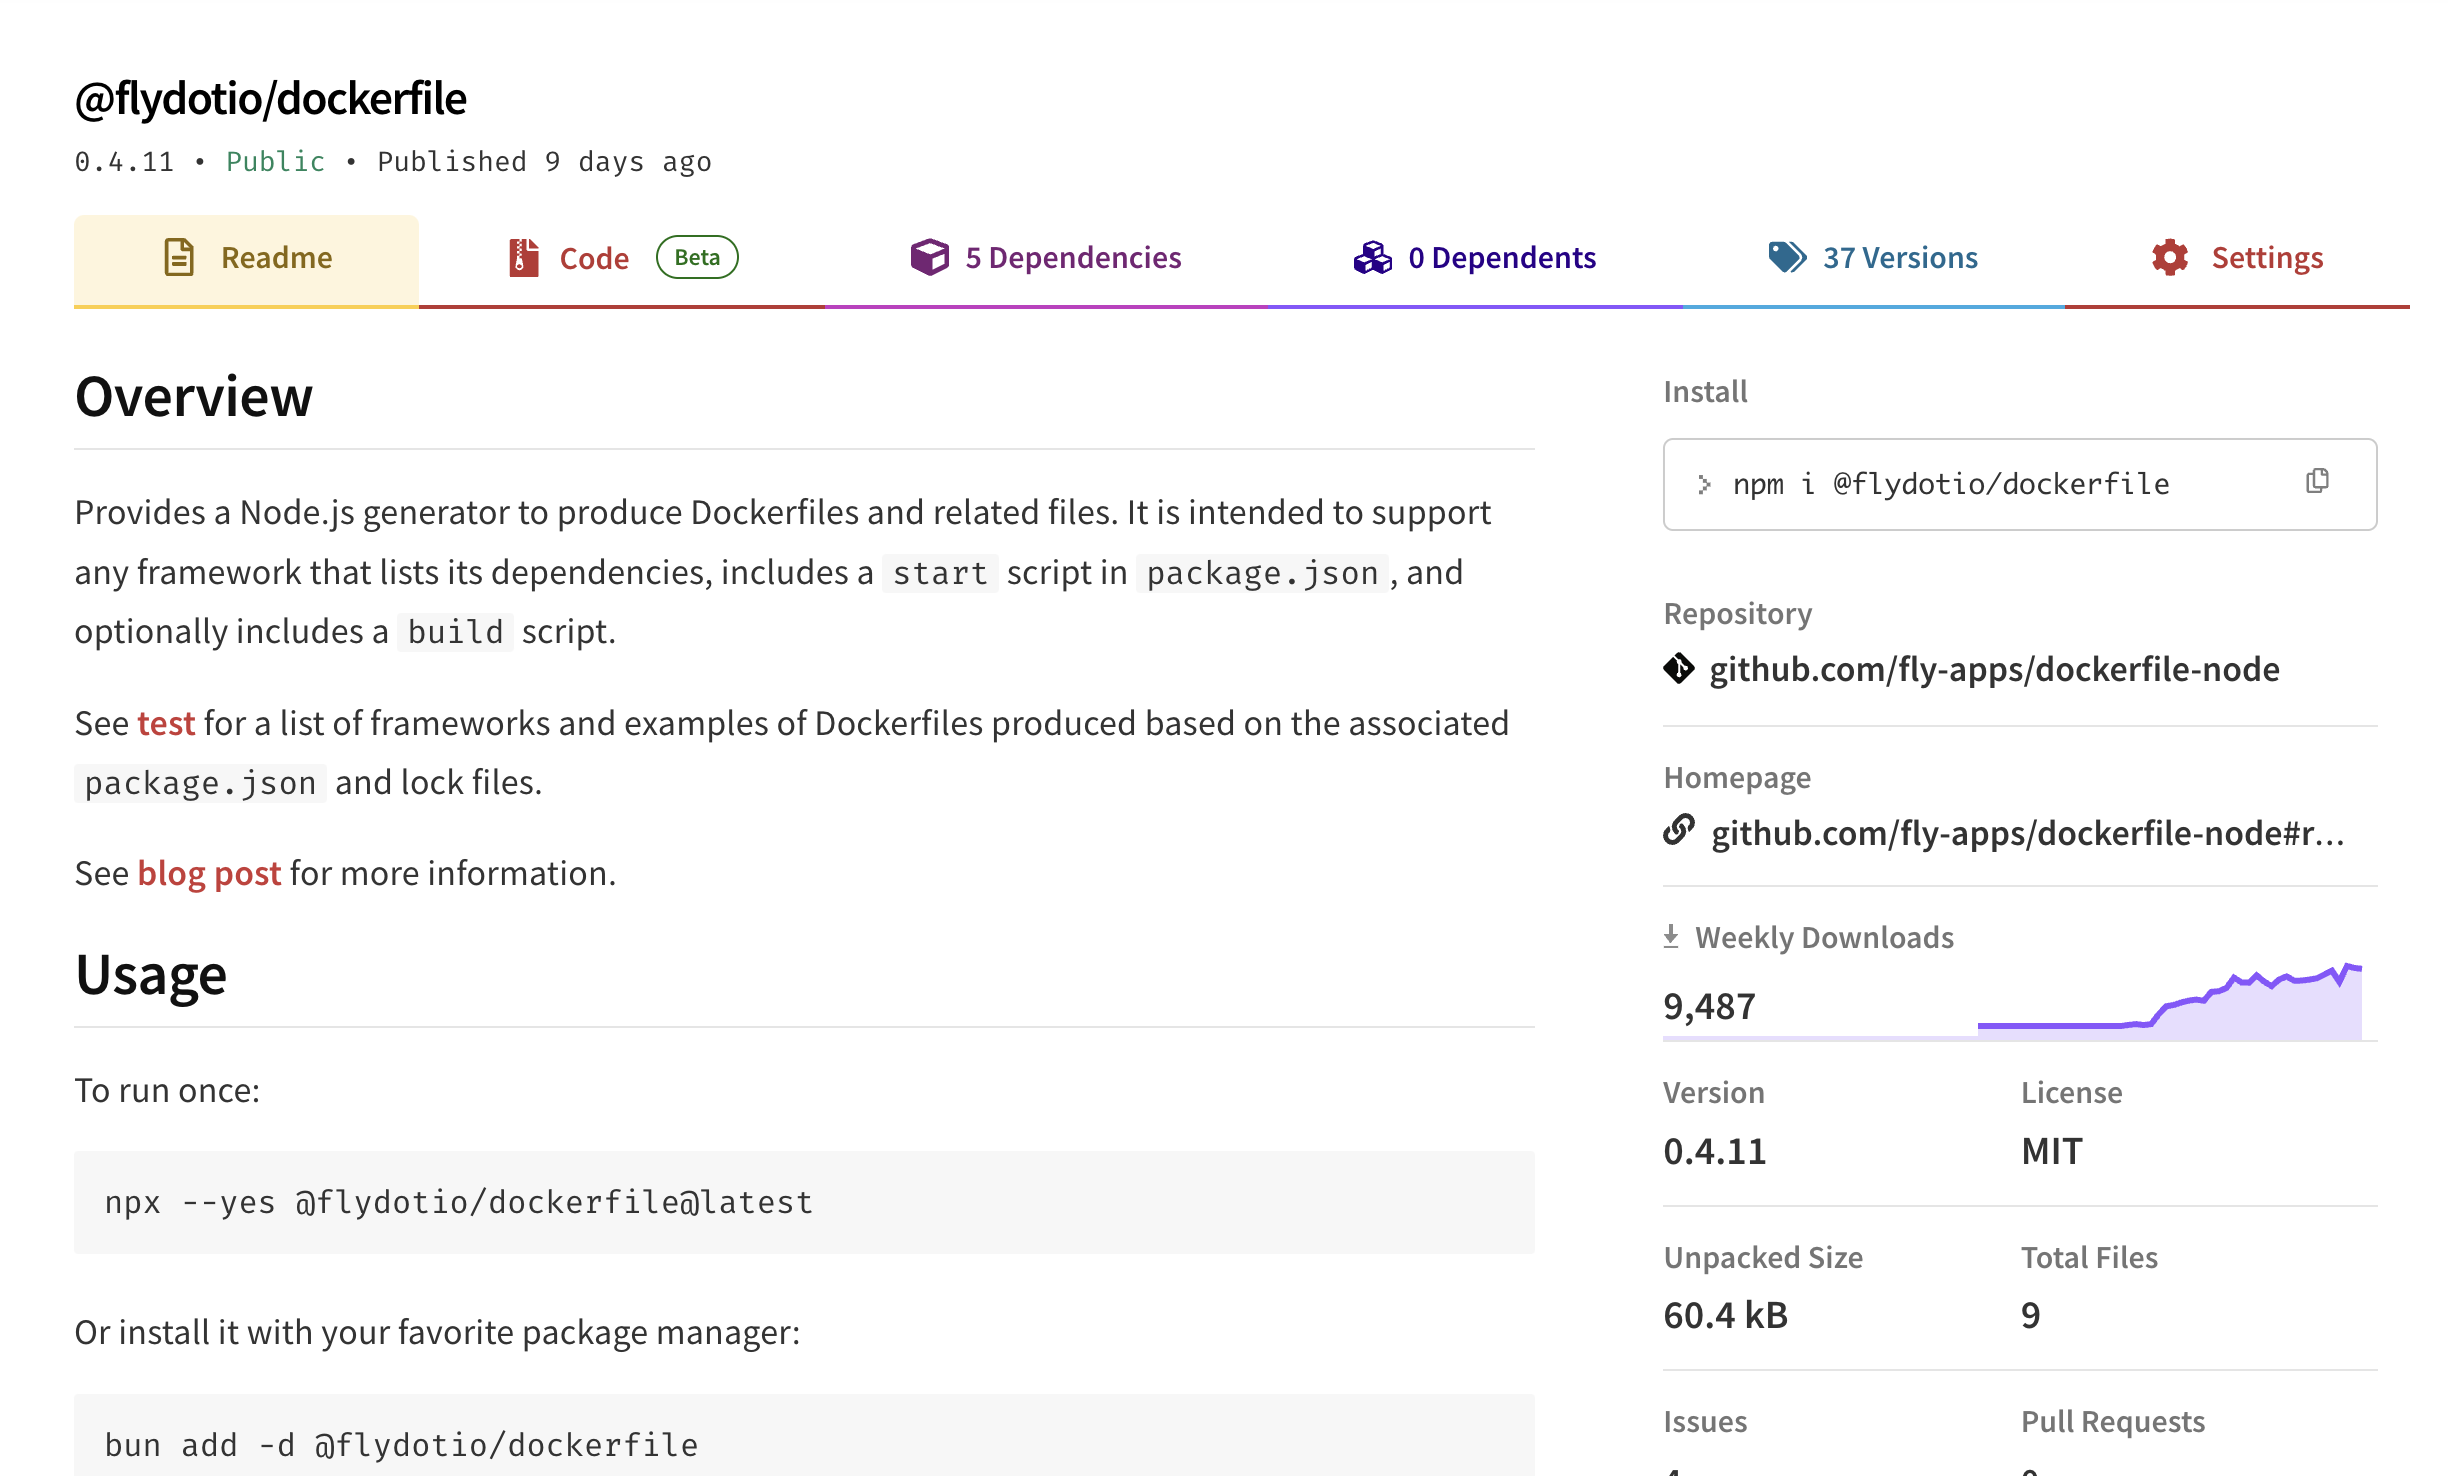
I’m going to cheat a little and tell you upfront that while having a stronger understanding of Dockerfile syntax is incredibly useful, there is an easier way (at least for JavaScript devs!), and that’s using Fly.io’s Dockerfile generator.
Using it is as simple as this:
$ npx @flydotio/dockerfile@latest
$ npx dockerfile
The package can be used with both npm and bun (you can use bunx instead of npx to run the script with bun). There are extra parameters for tweaking the Dockerfile as needed; be sure to check out the README for more details.
The Anatomy of a Dockerfile
Today we’ll be dissecting the Dockerfile for a Next.JS app as it covers all of the different ways you can use Dockerfiles productively. This will help explain the different parts of a Dockerfile even if you aren’t working on a Next.js app.
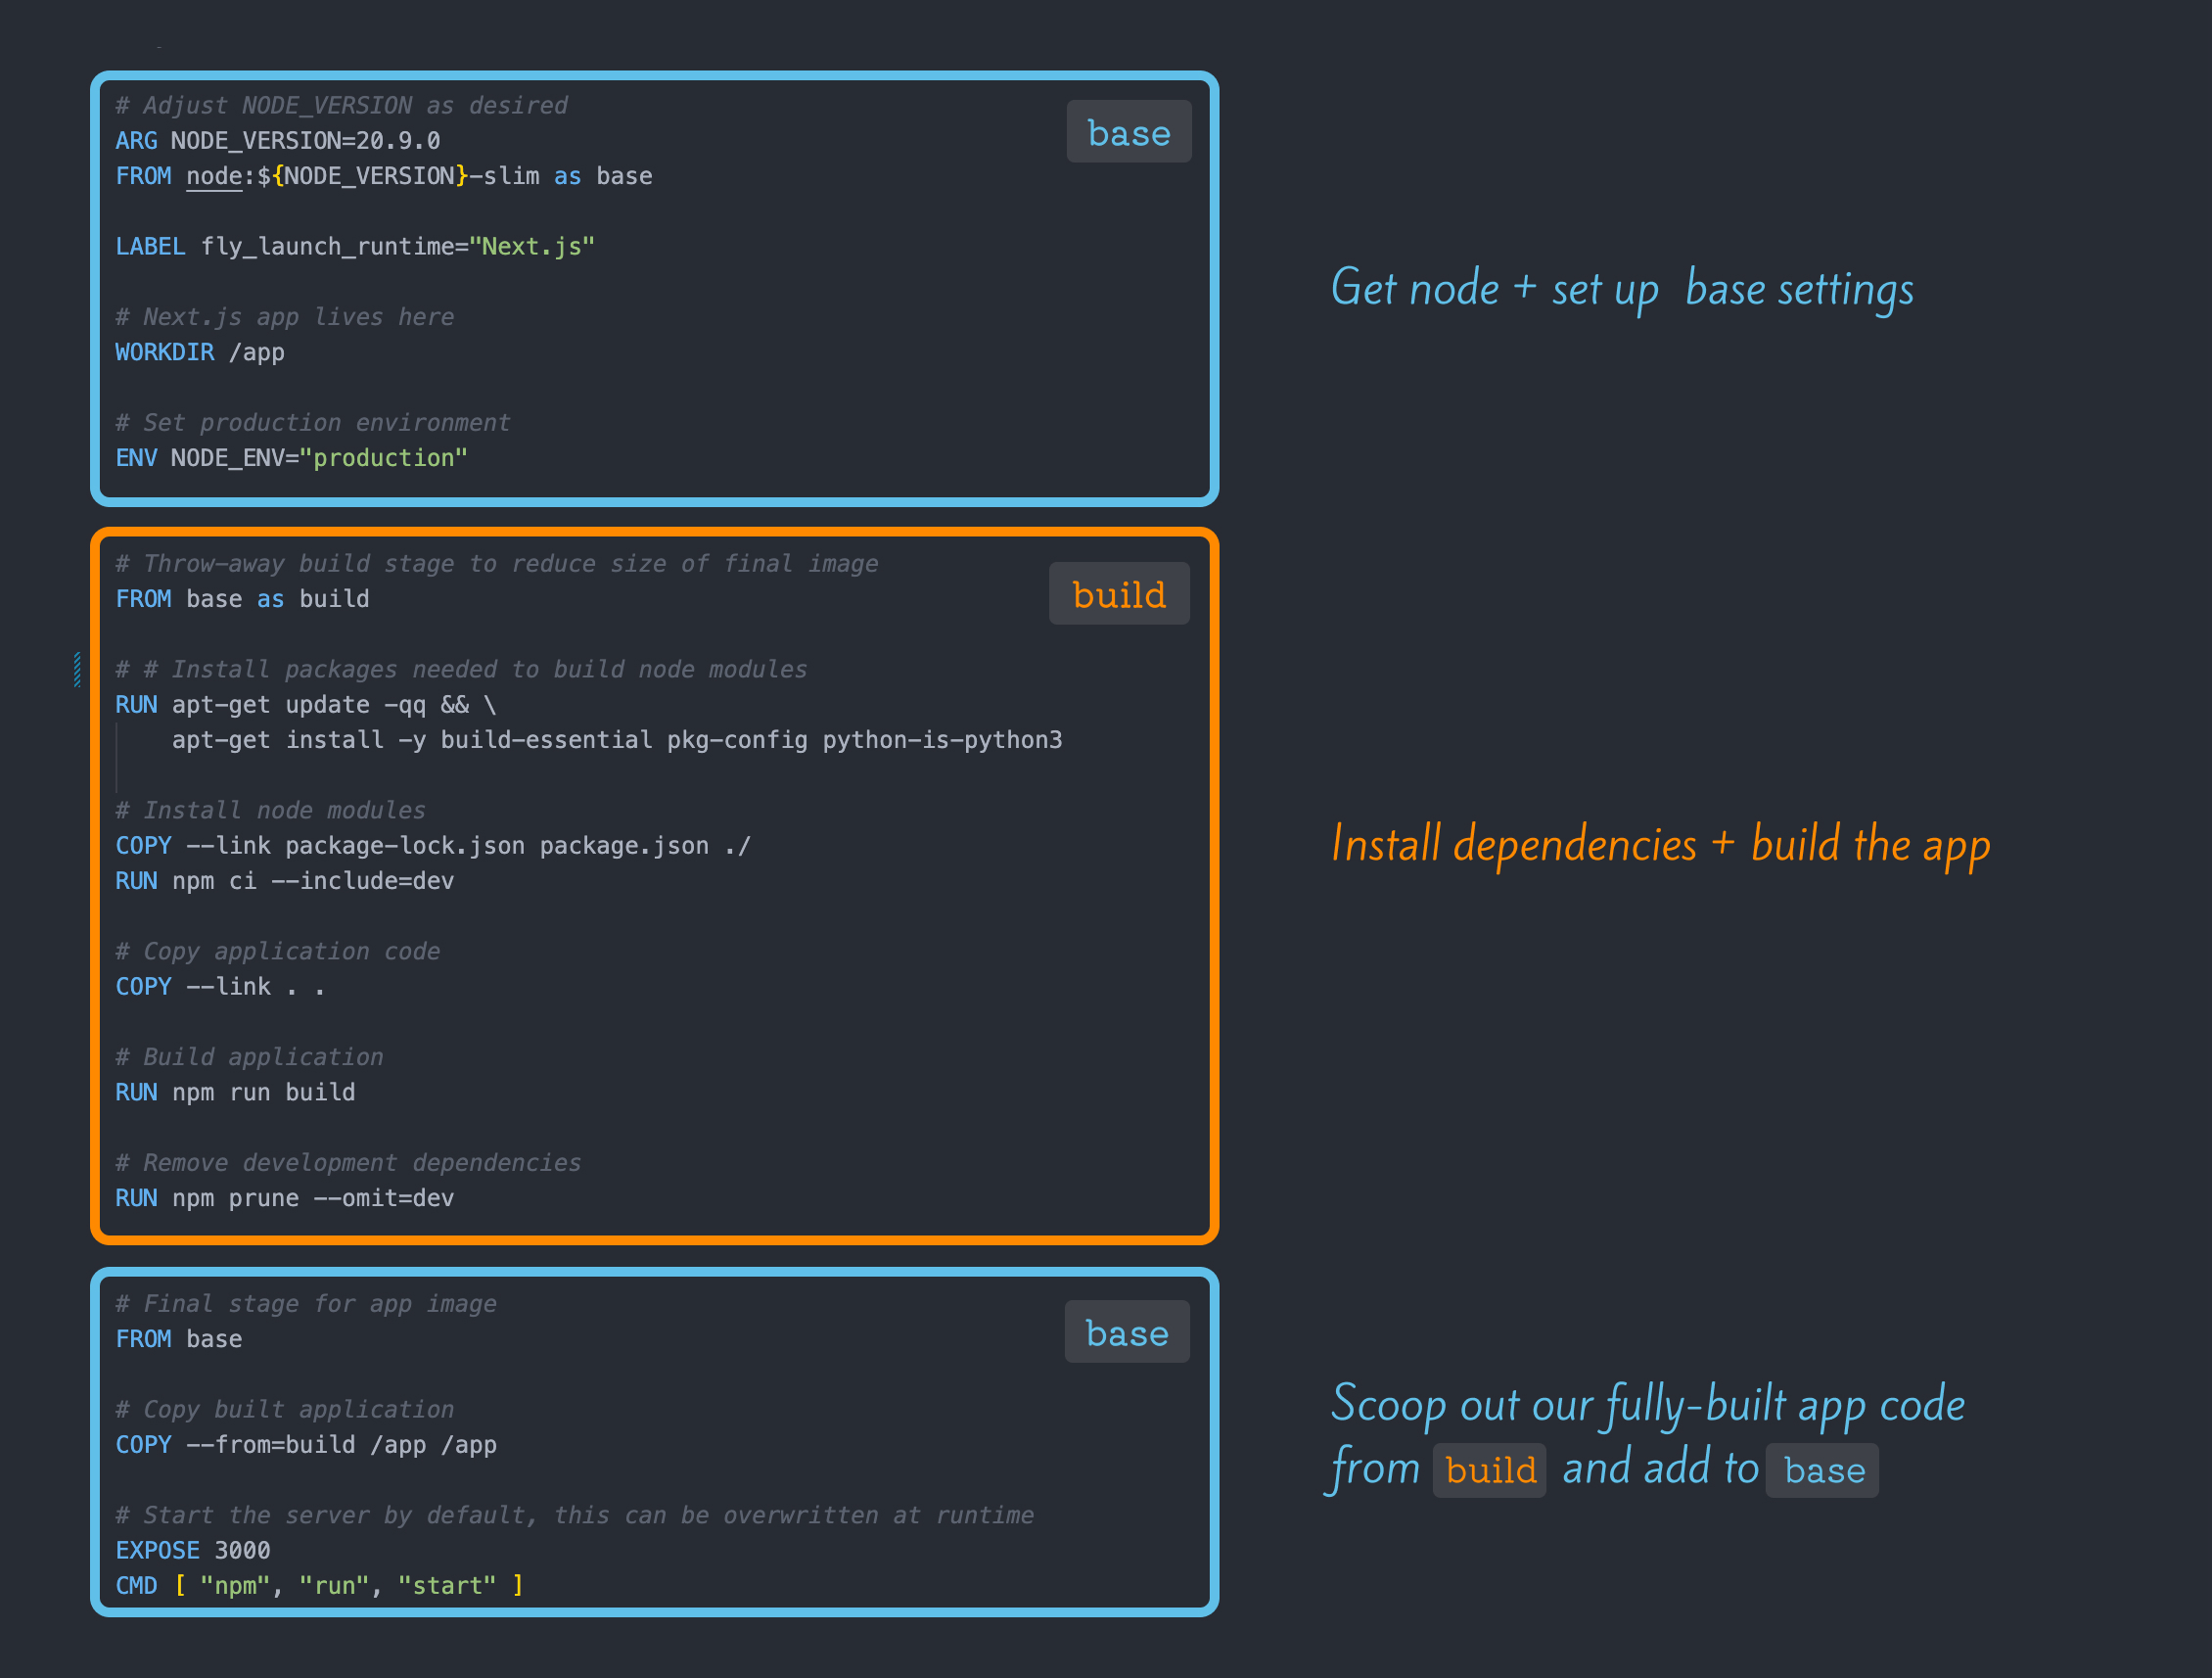
Here’s the Dockerfile we’ll be stepping through.
# syntax = docker/dockerfile:1

# Adjust NODE_VERSION as desired
ARG NODE_VERSION=20.9.0
FROM node:${NODE_VERSION}-slim AS base

LABEL fly_launch_runtime="Next.js"

# Next.js app lives here
WORKDIR /app

# Set production environment
ENV NODE_ENV="production"


# Throw-away build stage to reduce size of final image
FROM base AS build

# Install packages needed to build node modules
RUN apt-get update -qq && \
    apt-get install -y build-essential pkg-config python-is-python3

# Install node modules
COPY --link package-lock.json package.json ./
RUN npm ci --include=dev

# Copy application code
COPY --link . .

# Build application
RUN npm run build

# Remove development dependencies
RUN npm prune --omit=dev


# Final stage for app image
FROM base

# Copy built application
COPY --from=build /app /app

# Start the server by default, this can be overwritten at runtime
EXPOSE 3000
CMD [ "npm", "run", "start" ]
This might seem like a lot of steps. But there are reasons for every line, and by the end of this post, you’ll understand what each one does and why it’s used.
Let’s start by taking a high-level overview. Our Dockerfile can be broken into three stages:
- Set up our base image (spoilers: it’s just Node)
- Build the application
- Add our app code to our original base image
You’ll notice that each of these stages starts with a FROM statement, which sets a base image. FROM statements are used to set a base image, and there are a few things to note about them:
- Every Dockerfile must contain at least one
FROMinstruction - It’s possible to have more than one
FROMinstruction - The last
FROMinstruction always wins* – And by wins, I mean used in the final image. Everything before it gets tossed out
The reason you might want to have more than one FROM statement is to optimize the size of your final image. This brings us to an important topic for Dockerfile construction: multi-stage builds.
*This behavior can be overridden when deploying your app with fly deploy —build-target=<specific target>
Multi-stage builds: what they are and why we use them
Using multiple FROM statements in our Dockerfiles allows us to break up our build process into chunks and ultimately keep our final image as small as possible.
To give an analogy, let’s pretend you’re making a batch of vegetable stock. It’s dead simple: simmer a bunch of veggie scraps in water for an hour or so, and voila! You have stock. Now, as you might expect, you have to strain out the vegetables at the end; otherwise, you just made weird soup. But! Just because the end product doesn’t contain any vegetables doesn’t mean they weren’t vital to the process.

That’s the main advantage of multi-stage Docker builds. You borrow what you need from different images to do important work and use the result in your final image, tossing out the rest. The smaller your image, the faster your app starts.
Now that we have a high-level overview of the overall flow of the Docker build, here’s what happens at each stage.
Stage 1: base
ARG
ARG NODE_VERSION=20.9.0
We start our file by defining which version of Node (or Bun! Or anything else) we’d like to use. Simple enough, but what exactly is that ARG command?
In Dockerfiles, there are two ways of setting variables:
ARG- These are used to set build time variables. As you might expect, these variables are available at build time (but NOT runtime)ENV- These variables become available to your app at both build and runtime
Do not store sensitive data in your Dockerfile. They are safe to use for things like NODE_VERSION or NODE_ENV, but things like tokens, database URLs, or other secrets should be handled differently.
For handling build-time secrets, you’ll want to mount them using the RUN instruction. You can do this using the @flydotio/dockerfile package mentioned earlier, and then, when you deploy to Fly.io, set your build secret’s value (second command):
$ npx dockerfile --mount-secret=MY_SECRET
$ fly deploy --build-secret MY_SECRET=<value>
For handling runtime secrets, these should be kept out of your Dockerfile and instead set with the following command:
$ fly secrets set SECRET_PASSWORD=<value>
These secrets are exposed as environment variables when your application runs in production.
FROM
FROM node:${NODE_VERSION}-slim as base
The FROM instruction sets the base image on top of which all subsequent instructions are run. In our case, node is the name of the image and :<version>-slim is a tag that’s used to denote a specific version of the base image.
When it comes to tags, here’s what the official documentation for our node image has to say:
Some of these tags may have names like bookworm, bullseye, or buster in them. These are the suite code names for releases of Debian and indicate which release the image is based on.
SOURCE: https://hub.docker.com/_/node/
How do I know what Debian release my app needs to use?
For most applications using Node or Bun, we suggest starting with the -slim variant. This takes the most recent version of Debian and strips out everything that you don’t need. If you actually do need something that was stripped out, you can add it back later to your build stage using apt-get (something we’ll cover in the build stage section).
LABEL
LABEL fly_launch_runtime="Next.js"
LABEL lets you set arbitrary key-value metadata for your Docker images and containers. It allows you to annotate whatever you want should that information be useful for your automation. This is a Fly.io specific label used by our frameworks team to track commonly used frameworks so we know what to prioritize when working on new features. It’s technically optional, but it really helps us cater to the needs of your preferred framework! 😄
WORKDIR
WORKDIR /app
The WORKDIR instruction sets the current working directory of any subsequent RUN, COPY, and ADD statements. This is where your application code will be built, and it is also the folder that gets deployed into production.
ENV
ENV NODE_ENV="production"
The ENV instruction sets environment variables that are available during both build time and runtime.
Remember, your Dockerfile is source code. Source code must never contain secret information. If you need to set secret information as an environment variable, use Fly.io secrets:
$ fly secrets set SECRET_KEY=<value>
As stated previously in the section above about ARGs, the ENV` instruction is used to set environment variables that will be available during both the build and runtime. For setting sensitive data or secrets, please instead set your environment variables like so:
$ fly secrets set SECRET_KEY=<value>
Stage 2: build
As we discussed earlier, every time you encounter a FROM statement, you know you’ve reached a new stage in a Docker build. Let’s take a look at our Dockerfile’s second stage.
FROM ___ AS ____
FROM base AS build
This FROM...AS... signifies the start of our second stage. If you remember, our first stage began with node:<version>-slim which we named base. Now in stage 2, we’re making a copy of base and naming it build. From here on out, anything done to build will not affect the original base. You’ll see later that this allows us to cherry-pick only the bits we want to keep from build and toss the rest.
RUN
RUN apt-get update -qq \
 && apt-get install -y build-essential pkg-config python-is-python3
Now that we’ve established a copy of base as build, we’re going to start doing some actual build work. First, let’s understand what the RUN instruction is used for, and then we’ll talk about this apt-get command.
The RUN statement is used to run commands. Shocker, I know. But it’s worth noting that it’s not the only way to run a shell command. There are actually three common instructions used for such tasks:
RUN: Always creates a new layer, thus it’s best to chain these commands into a single instruction, just as we’ve done above with multipleapt-getcommands. Generally speaking, RUN is great for the setup of application code.ENTRYPOINT: This sets the process that is first run inside your container. This is generally NOT your web server. The default entry point is/bin/sh -c, which starts up a shell process, but can be customized with theENTRYPOINTinstruction. Anything you set with the CMD instruction will then get passed as a parameter to that shell process (such as the command for starting your server).CMD: This instruction sets the default command that’s passed to your entrypoint. This is typically where you would write the command to start your web server, for example, such asCMD ["npm", "run", "start"].
You might be wondering, what’s the difference between…
<INSTRUCTION> npm install
And using an array of strings, like so:
<INSTRUCTION> ["npm", "install"]
The difference is that when you use a string argument, Docker will run your command inside a shell (more specifically, inside /bin/sh -c). If you use a string array, it’ll run the program directly without wrapping it in a shell. In many cases, this doesn’t matter, but sometimes it can matter in very uncommon use cases, such as when you don’t have an OS in your container image or when every kilobyte of RAM matters.
What is apt-get, and why do I need it?
The tool apt-get is used for installing and managing Debian-based Linux packages (think NPM, but for OS packages; it’s similar to homebrew on macOS). The packages we’ve included (build-essential, pkg-config, and python-is-python3) are common requirements for many JavaScript packages. Experimentation may be required to find the exact set of dependencies your application requires, but even if you think your application won’t need them, it’s safe to keep this line for future development without worrying about bloat, as these won’t be included in your final image.
COPY
COPY --link package-lock.json package.json ./
After installing any Linux package requirements, we can finally start copying over parts of our application code. The COPY instruction copies a local file in your repository to a location on your Docker image.
What is --link?
Typically, if there are new changes to the layers preceding a COPY, that COPY statement will need to be re-run. Remember, for nearly every Docker instruction, a new layer is created, and layers are the tarballs that make up our Docker image. Because these layers need to be, well, layered, a diff is run to see if there are any changes to the previous layers that might affect the current one. If there are changes to earlier layers, it will invalidate the subsequent ones.
However, by including --link, we create a new layer that does not get invalidated when changes to the preceding image are made, allowing us to cache our --link layers.
To learn more, check out this article, which includes a super helpful infographic to illustrate the difference between COPY and COPY --link.
The last lines of our build step should now feel more familiar. At this point, we’re simply installing the rest of our dependencies, copying over our application code, and shucking out all of our devDependencies so our code is ready for production.
RUN npm ci --include=dev

# Copy application code
COPY --link . .

# Build application
RUN npm run build

# Remove development dependencies
RUN npm prune --omit=dev
Which now brings us to the final stage…
Stage 3: base + build
# Final stage for app image
FROM base AS runner

# Copy built application
COPY --from=build /app /app
We’re in the home stretch! Since we’ve reached the final FROM in our file, we know that base is going to be the target for our final image.
COPY --from=<target>
You’ll notice our COPY statement includes --from=build. This is the magic of using multi-stage builds. Here, we are cherry-picking the parts from our build target and leaving anything that we don’t need for runtime behind. This keeps our final image as small as possible!
EXPOSE
EXPOSE 3000
CMD [ "npm", "run", "start" ]
We’ve made it to the end of our Dockerfile! We talked briefly about CMD statements in the sections about RUN statements, and now we can see it in action. As mentioned previously, when starting a web service, CMD is typically the instruction used to specify our start process.
Just before our start command, however, we specify the internal port that we want our Docker container to expose using the EXPOSE instruction. The key word here is internal – for web services, the specified port gets mapped to external port 80 or 443 for accepting HTTP(S) requests.
A note when deploying to Fly.io: this internal port is also set in your fly.toml. Any port specified here will overwrite the port you set in your EXPOSE instruction:
[http_service]
  internal_port = 8080
Conclusion
Hopefully, by now, you’re starting to feel more comfortable with your understanding of Dockerfiles.
Now, I did mention our Dockerfile generator node package at the beginning of the article, but there’s an even easier method:
$ fly launch
When deploying on Fly.io with fly launch, if a Dockerfile doesn’t already exist, we generate one for you! This guide we walked through today should make understanding and tweaking the generated Dockerfile more approachable. If you get stuck, please do reach out to us on our community forum so we can help.
Congratulations, you’ve now passed Docker on Fly.io 101. Go forth and build cool things!